How to Create and Where to Use Google Web Stories on WordPress

Table of Contents
Storytelling is undoubtedly one of the most effective ways to grab customers’ attention and keep them engaged with your content. We watch stories on Instagram, Facebook, Snapchat, and Twitter fleets almost daily. It’s the main source of information for most of us. So why don’t we integrate our WordPressWordPressOpen-source content management system (CMS) that allows users to create and manage websites and blogs.
More About WordPress websites with similar functionality? Using Google Web Stories on WordPress is a great chance to become a storyteller on your site while simply installing a dedicated WordPress pluginPluginA piece of software that can be easily installed and activated on a CMS platform to enhance its capabilities.
More About Plugin.
In this article, we’ll take a closer look at the functionality of Google Web Stories for WordPress and check how to integrate your website with catching and beautiful stories worry-free.
Let’s dive in!
What Are Google Web Stories?
Stories are the content creation option commonly used on social media platforms. These are visual posts often presented in the form of a slideshow. The main goal of such content is to tell a story or present something in an engaging and visually striking manner. Besides stunning visuals, the story may include texts, animations, and other effects that can spice up the content presentation.
If you have a profile on Facebook or Instagram, likely, you are already familiar with the concept of Stories, and they do not need any extra presentation.
On a WordPress site, you can create stories and embed them in the selected pages of your website, blog posts, sidebars, or any other custom area. Featuring such content on your website is a great way to communicate with your audience through visuals rather than words.
Where to Use Google Web Stories on WordPress
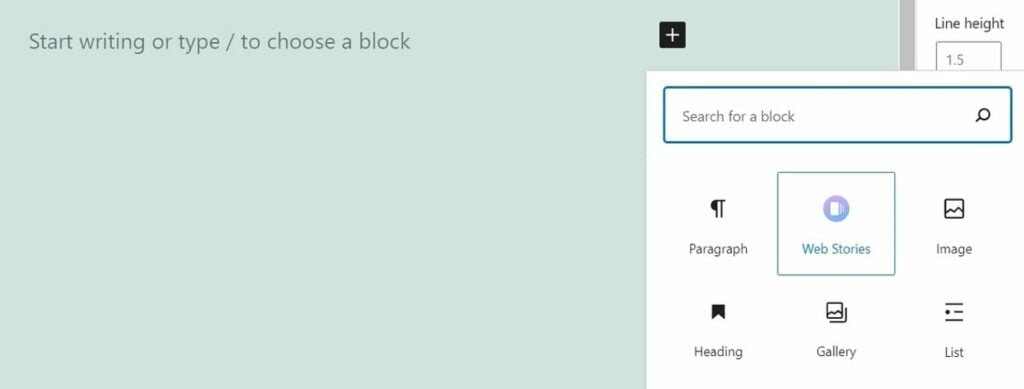
WordPress lets you add stories to any post or page of your website, using the Web Stories WordPress plugin. The process of featuring stories on your site is similar to creating a new post in GutenbergGutenbergA block-based editor for WordPress.
More About Gutenberg editorEditorThe interface that allows you to write and format text, add images, embed media, and much more.
More About Editor. To post a story, simply add a new block. And select Web Stories.
You may choose to either display all the latest stories, make a selection of several stories, or enter the URL of the single story that you want to feature on a post or page. If you choose the latter option, open your WordPress dashboard and click Stories > My Stories. Choose the URL of the story you’d like to copy, click on three dots next to the story’s name, and choose Copy Story URL.
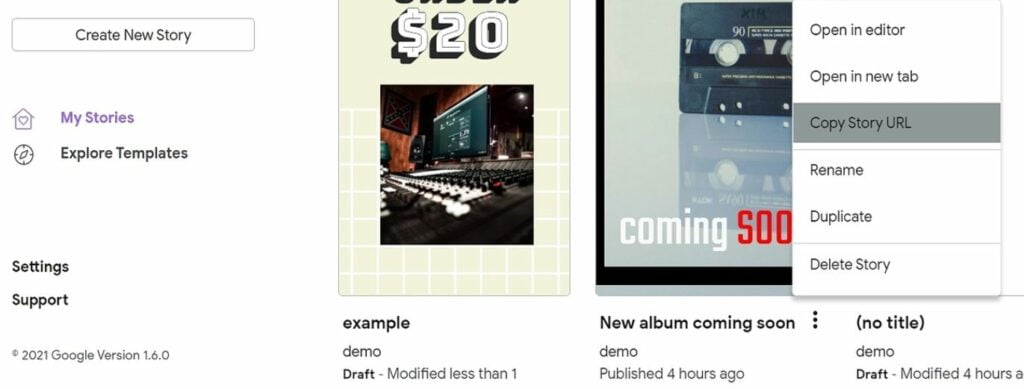
Get back to your post or page and paste the URL of the story.
If you want to display several stories simultaneously, WordPress lets you choose from different layouts, namely list, gridGridA framework of vertical and horizontal lines that intersect to create a series of cells or modules.
More About Grid, circle carousel, and box carousel.
There is also an option to use web stories as widgets integrated into your site’s footerFooterA section at the bottom of a webpage with contact details, copyright notices, and links to important pagesOne of the primary functions of a footer is to provide navigation.
More About Footer or sidebarSidebarA vertical column that appears alongside the main content, providing additional information, links, or widgets that are relevant to the main content.
More About Sidebar sections.
How to Create Google Web Stories on WordPress
With that said, let’s learn how to create and publish stories on a WordPress site step-by-step.
Step 1 – Plugin Installation
As said above, we’ll use the Web Stories WordPress plugin. The first thing that we should do is install the plugin via the WordPress dashboard. It’s free so that you can find it through a simple search via your site’s admin area.
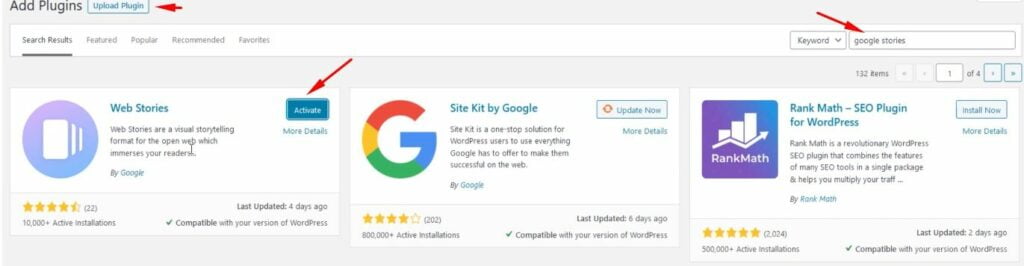
After you install and activate the plugin, you will see a new entry in the left-side menu of your dashboard dubbed Stories.
Before you start creating stories on your site, you need to adjust settings based on the goal you want to achieve using the dedicated functionality. To do it, navigate Stories > Settings. You can set up Google AnalyticsGoogle AnalyticsA web analytics service that provides valuable insights into the performance and user behavior on websites and mobile applications.
More About Google Analytics tracking, monetization, video optimization, and custom logos.
Step 2 – Creating Stories
To create your first Google Web Stories on WordPress, navigate Stories > Add New. An editor will show up in front of you.
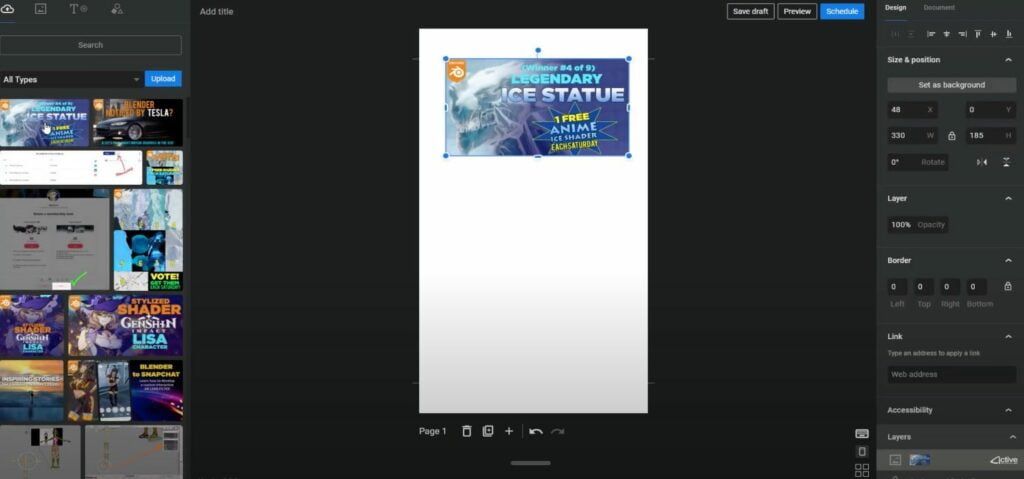
The web stories editor has a simple interface:
- To the left, there is a menu of elements that you can feature in your stories layouts;
- In the middle of the workspace, you can see the canvas where you can drag and drop multiple elements for your stories;
- To the right, there is a sidebar with customization options that lets you edit the document’s settings before publication.
The Google Web Stories editor for WordPress also provides you with quick access to all files stored in your website’s media library. It also lets you upload images, videos, and GIFs that you will use in stories.
The tool also lets you search for visuals on the web. Simply type in the keyword and pick the options that perfectly match the topic of the stories you want to share.
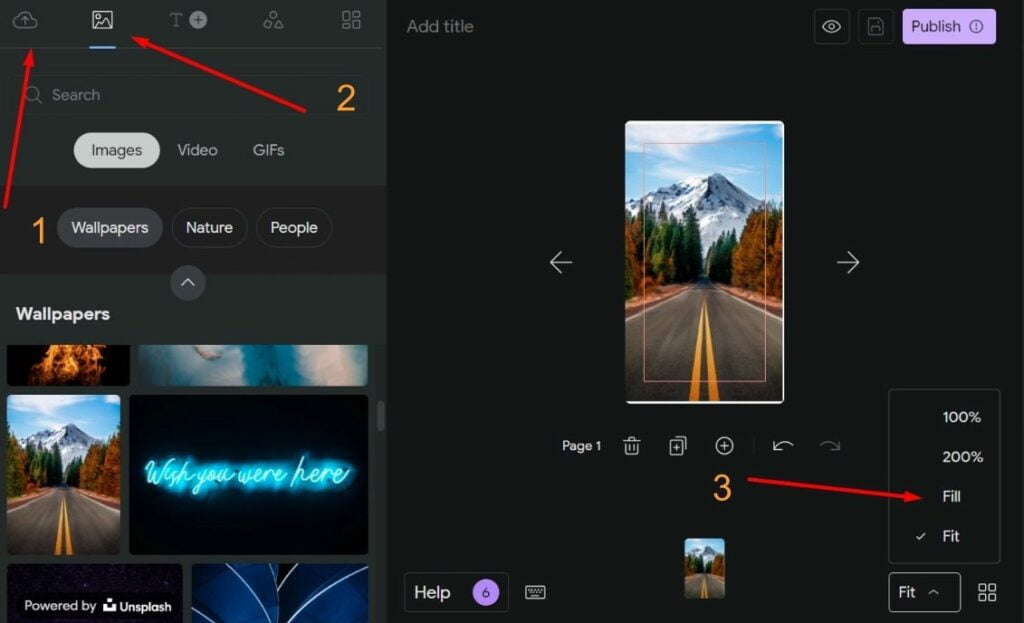
Step 3 – Add a Background
To add a background to your story, you need to click on the white canvas and pick your favorite color from the right sidebar. You can completely fill the background with an image selected from the plugin’s photo gallery. To make the image fill the canvas, click on the Fill option in the Fit settings.
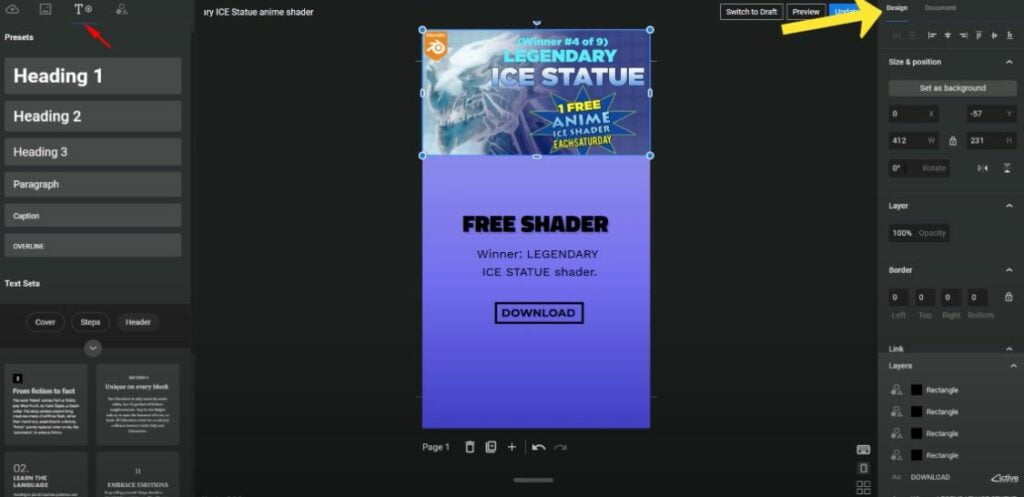
Step 4 – Add Text
To add and edit the text of your story, click on the T symbol in the left sidebar. Choose the font and style. The text elements will show up over the background of your story. You can go ahead and start writing right on the story. To edit the text, customize the color, font, opacity, etc., use the settings from the right-hand menu.
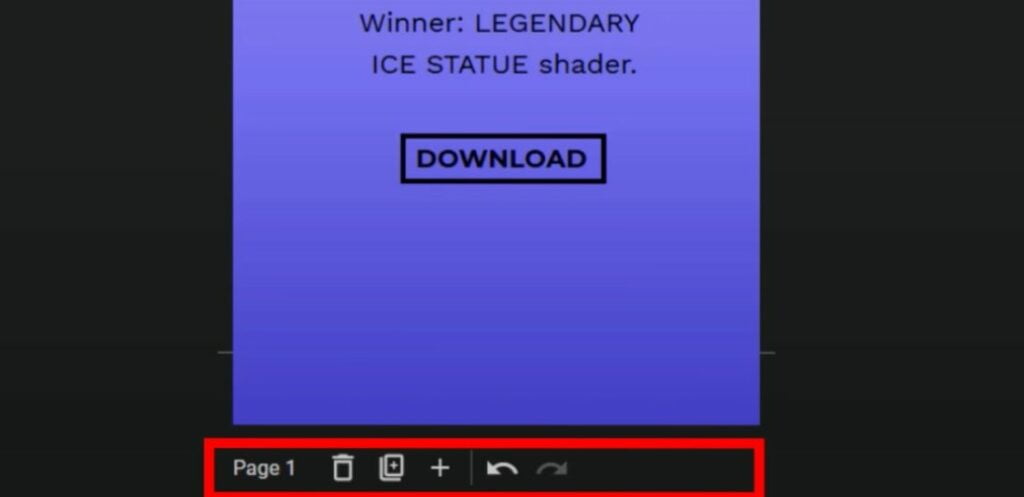
Step 5 – Add 2 and More Pages to Web Stories
Your Google Web Stories on WordPress can have from four to thirty slides. To add more pages to your story, use the options below the canvas. There are options to delete, duplicate, add new, redo/undo, and play the story. Click Add New to add more pages. If you want to use the same layout on all pages of your story, simply click on the Duplicate option and adjust texts, effects, and visuals for each page individually.
Step 6 – Publish Your Story
When you finish editing your story, there are a few more things you should take care of before hitting the Publish button. In the right sidebar, click on the Document and fill in all the necessary details (it’s similar to managing the WordPress blog post settings).
You’ll be asked to add the story description, upload the cover image, your logoLogoA visual representation of your brand.
More About Logo, set its slug, choose between automatic and manual slideshows, set the duration between slides.
Right before publishing the story, look through the checklist with recommendations for your story or individual pages. Some indicators are high-priority. Others are pure recommendations and it’s up to you to decide whether you accept them or not.
When everything is ready, publish your story. Use the URL to embed it into any page or post of your site and increase user engagement!