How to Handle Custom WordPress Navigation Menus

Table of Contents
Navigation is an essential part of your website’s usabilityUsabilityThe measure of a product’s effectiveness, efficiency, and satisfaction for its intended users.
More About Usability. Depending on how well it’s structured, a customer will be able to find the needed content and stay on your website for long or get lost after a few clicks and simply leave for a competitor’s site with better navigation patterns. If you need more than your WordPressWordPressOpen-source content management system (CMS) that allows users to create and manage websites and blogs.
More About WordPress site’s default navigation patterns, then custom WordPress navigation menu options are the best choice for you.
By default, ready-to-go WordPress themes include predefined menu locations and layouts. As a rule, WordPress menus are presented in the form of horizontal lists of links placed at the top of the web page. However, if you’d like to add a unique vibe to your website, create and add custom navigation menus anywhere on your WordPress themeWordPress ThemeA collection of files that determines a website’s overall design and functionality.
More About WordPress Theme.
Following the steps that we describe in this guide, you can create a custom navigation menu for your WordPress site and manage it just the way you wish. It’s easy for intermediate users to add custom WordPress navigation menus in their WordPress themes, quickly and worry-free.
If you wonder how to create and display custom navigation menus on your website, add menus with a page builderPage BuilderA tool letting users create and design web pages code-free.
More About Page Builder, create responsive menus, and add custom WordPress navigation menu with plugins. The following guidelines will come in handy for you.
How to Create Custom WordPress Navigation Menus
It’s a feature included in all WordPress themes. Besides the default menu, you can create a custom menu that you will translate into any language and put into your choice location. To get started, you need to register your new custom WordPress navigation menu by adding the following code to the functions.php file of your WordPress theme.
function wpb_custom_new_menu() {
register_nav_menu(
'my-custom-menu',__( 'My Custom Menu' )
);
}
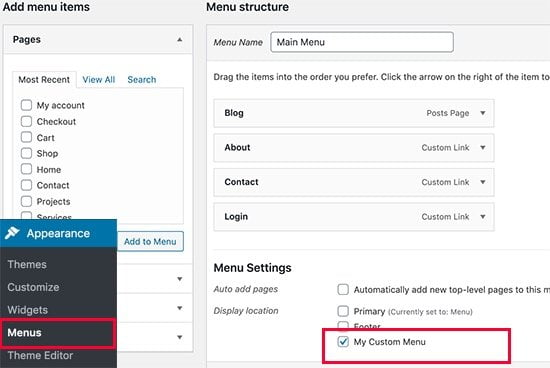
add_action( 'init', 'wpb_custom_new_menu' );Next, navigate to your WordPress dashboard. Click Appearance > Menus to create a new menu. In a new window, you will see the options to edit the menu structure and adjust the location settings. Check “My Custom Menu.”
If you decide to add more than one menu location, use the following code:
function wpb_custom_new_menu() {
	register_nav_menus(
		array(
			'my-custom-menu' => __( 'My Custom Menu' ),
			'extra-menu' => __( 'Extra Menu' )
		)
	);
}

add_action( 'init', 'wpb_custom_new_menu' );
Once done, you can add menu items in the admin panel of your WordPress site. It’s easy to do using the intuitive WordPress dashboard.
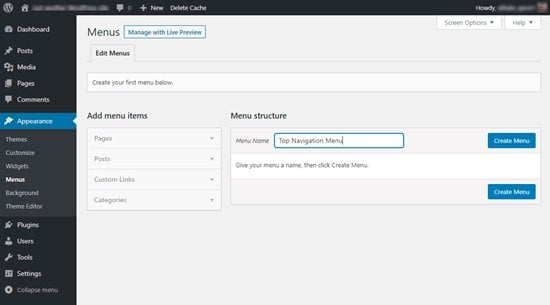
To begin with, click Navigation > Menus > add Menu Name > click Create Menu.
In the next step, you need to decide what pages you’d like to feature in the menu. You may either pick all top-level pages or make a custom choice in the left column. As you may see on the image below, you may pick from the Most Recent menu items, choose to View All or search for the items you’d like to add to your menu. Once selected, click Add to Menu.

Once you pick the menu items, you can move them around while dragging and dropping in the intuitive visual mode. You can also create drop-downs in the same drag-and-drop dashboard.
Once done, click Save Menu and watch the results of your work on your WordPress site. You may edit the menu, change the position of items, add or remove items whenever you wish.
How to Display Custom WordPress Navigation Menus
The most common place where WordPress menus are displayed is in the headerHeaderA visual and typographical band or menu commonly situated at the uppermost part of a website’s interface.
More About Header section of your site. But, you may choose any other location for your menu. All that you need to do is to add several lines of code in the theme’s templateTemplateA website template is a pre-designed webpage that is a starting point for creating a website.
More About Template file.
<?php

wp_nav_menu( array(
	'theme_location' => 'my-custom-menu',
	'container_class' => 'custom-menu-class' ) );

?>
The theme location is the Menu Name that we selected in the previous step.
The container class is the CSSCSSCascading Style Sheets is a coding language that determines the appearance and layout of a website.
More About CSS class that you added to the navigation menu. Using it, the custom menu will be displayed in the form of a plain bulleted list on your web page.
You can also use the CSS class .custom_menu_class to style your menus. Here’s a simple example:
div.custom-menu-class ul {
	margin:20px 0px 20px 0px;
	list-style-type: none;
	list-style: none;
	list-style-image: none;
	text-align:right;
}

div.custom-menu-class li {
	padding: 0px 20px 0px 0px;
	display: inline;
}

div.custom-menu-class a {
	color:#FFFFFF;
}
How to Add a Responsive WordPress Menu
The most popular and easiest way to add a responsive menu in WordPress is by using a pluginPluginA piece of software that can be easily installed and activated on a CMS platform to enhance its capabilities.
More About Plugin. It’s the preferred method for beginners as it doesn’t require any coding manipulations. In the steps described below, we’ll show how to create a usable hamburger menu that slides out on mobile devices.
First of all, you need to install and activate the Responsive Menu plugin.
As soon as you activate the plugin, you will see the Responsive Menu tab added to your WordPress dashboard. Click on it to be taken to the settings.
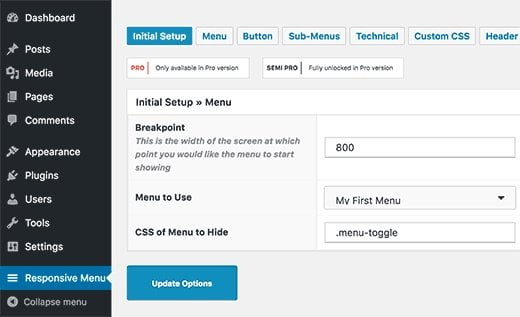
First, you need to specify at what screen width the plugin should switch to showing a responsive menu. 800px is set as the default settings that will work on most websites. After that, choose what Menu to Use (this is where you can pick the custom menu you created in the previous step).
You need to do one more thing before you save the changes to provide a CSS class for the current non-responsive menu. It lets you hide the non-responsive menu on smaller screen sizes and display the responsive menu that you’ve specified.
Once done, click save the changes and watch your work’s results live on your WordPress theme. You can check how well the responsive menu replaces the non-responsive menu option while using different devices with different screens or merely zooming in on your WordPress site.
How to style WordPress navigation menus
Once you create a new or custom navigation menu, you can choose from multiple ways to customize the navigation menu style according to your personal or brand’s needs. To modify the type of WordPress menus, you need to apply specific changes to the CSS script. You can do this manually or with the help of a plugin. Let’s see how each of these methods works.
Manual customization of WordPress Menu styles
To customize WordPress menus manually, you should have at least intermediate knowledge of code. By default, WordPress navigation menus are displayed in unordered lists. As a rule, the default WordPress menu tag will reveal menus with no CSS classes associated with it.
<?php wp_nav_menu(); ?>You can bring some order and style to the menu using CSS classes.
The class name with every list item will be “menu” in the bulleted list that comes with its own CSS class.
If you have only one menu location, it will work pretty well. With the default CSS, a class may conflict with WordPress menus in other locations. It means that you need to define a CSS class and menu location.
Please mind that your WordPress theme may already be doing this. It might be adding a navigation menu using a class code like the one given below:
<?php

wp_nav_menu( array(
	‘theme_location’ => ‘primary’,
	‘menu_class’ => ‘primary-menu’,
) );

?>
The CSS class code tells where the theme shows the primary menu. It adds a CSS class primary menu in the navigation menu.
There is also an option to customize the style of the WordPress navigation menu using the following CSS structure.
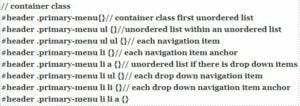
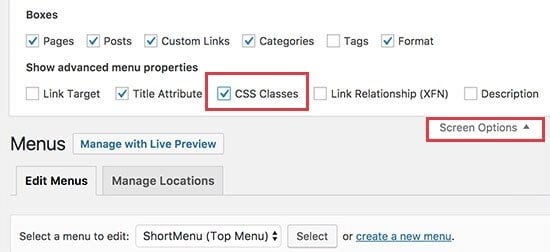
Working with WordPress, you can add custom CSS classes to different menu items. The same functionality lets you add an image icon to your navigation menu. To do this, open your WordPress dashboard and navigate Appearance > Menus > Screen options.
Customizing the style of WordPress menus with a plugin
Beginners can easily handle the following guidelines because they do not require any coding knowledge from your side.
The quickest and most comprehensive way of customizing WordPress menus is using the CSS Hero plugin. With its help, you can add a unique design and style to your WordPress page without the need to modify a single line of code.
To get started with the plugin, you need to install and activate it. Upon activation, you will be redirected to CSS Hero license key where you need to follow all the instructions. Once done, you will be taken back to your website.
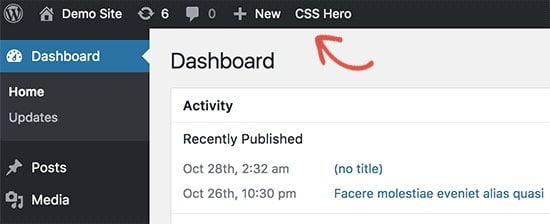
When you get back to your WordPress dashboard, you need to click on the CSS Hero button that appears in your WordPress admin toolbar.
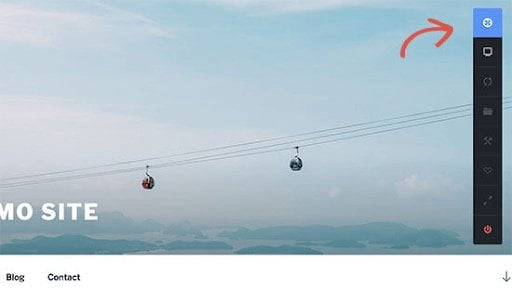
The plugin adds functional WYSIWYG editing capabilities. It means that you can edit your WordPress site’s style and watch the results of your work instantly. The floating CSS Hero Toolbar will appear on the screen. To start editing, click on the blue icon and move your mouse to the navigation menus. The plugin will highlight it with the borders. With a click on the menu item, CSS Hero will reveal what can be done with a specific element.
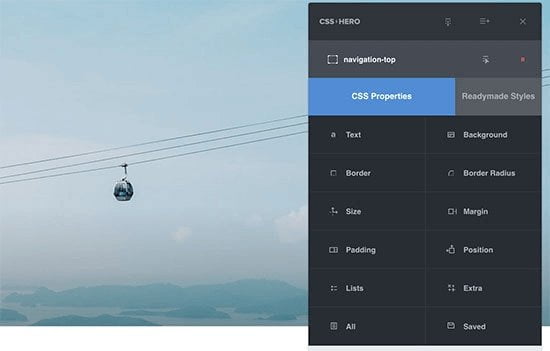
The plugin lets you edit the background, text, margin, border, etc. As soon as you apply the needed changes, you may watch them live on your site.
Navigation Menu Plugins
Using WordPress navigation menu plugins, you can manage your site’s main navigation panel just the way you want, without investing a lot of time and effort in developing custom menus for your web resource. Many plugins are compatible with popular drag-and-drop page builders for WordPress. Installing such extensions to your website, you get a chance to adjust impressive navigation panels without the need to worry about coding tasks. Let’s take a closer look at some of the most popular navigation menu plugins for WordPress.
Full Screen Menu for Elementor
As the name suggests, using this plugin you can add a full-screen menu widget to the ElementorElementorA drag-and-drop page builder for WordPress.
More About Elementor page builder. To get started with this extension, you need to activate Elementor first. Once dine, the respective widget will be available for use in Elementor.
The plugin installs with the help of WordPress built-in plugin installer. To activate it, go through the “Plugins” menu in your WordPress dashboard. Next, browse to Pages > Add New. Click Edit with Elementor. In the left-hand panel, you can find the Full Screen Menu option. Once located, drag and drop the element to the content area and start managing the visual mode’s full-screen menu.
Clever Mega Menu for Elementor
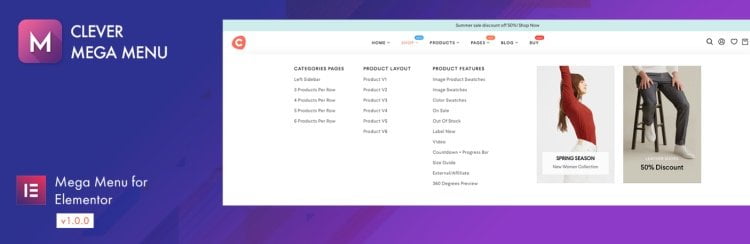
Here comes one more useful extension for Elementor page builder. You can enhance your site’s navigation with a mobile-friendly MegaMenu with the drop-down functionality with its help.
There are Lite and Pro versions of the plugin available. You may begin with the freebie, which offers plenty of handy options, like:
- RTL support;
- Selective menu skins and menu icons;
- Collection of menu layouts;
- Drag and drop functionality;
- Touch, retina and accessibilityAccessibilityThe practice of designing and developing websites that can be easily accessed and used by individuals with disabilities.
More About Accessibility ready; - CSS3 menu transition effects;
- Display mega menus and flyout menus responsively;
- Multiple menus per page with different menu skins, etc.
Clever Mega Menu for Visual Composer
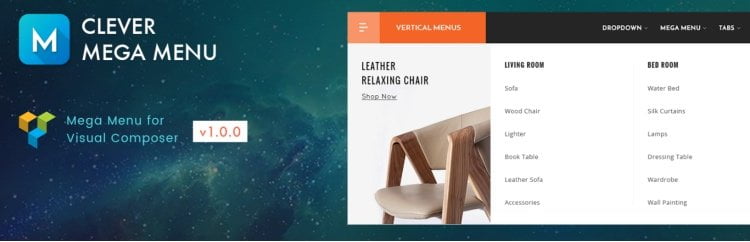
If you prefer using Visual Composer, then the Clever Menu plugin will help you create stunning, user-friendly and fully customizable MegaMenus with its help. The extension lets you update your site’s main navigation panel with literally all you wish, including widgets, shortcodes, and raw HTMLHTMLThe fundamental language used to create and structure content on web pages.
More About HTML. You may apply any sort of change without the need to tweak a single line of code while simply working in the drag-and-drop mode.
Highlighted features:
- Selective menu icons, menu skins, and submenu layouts;
- Import/Export menu themes option;
- Show/hide menu;
- Touch, retina and accessibility ready;
- Multiple CSS3 menu transition effects;
- Multiple menus per page with different menu skins, etc.
Multilevel Navigation Menu
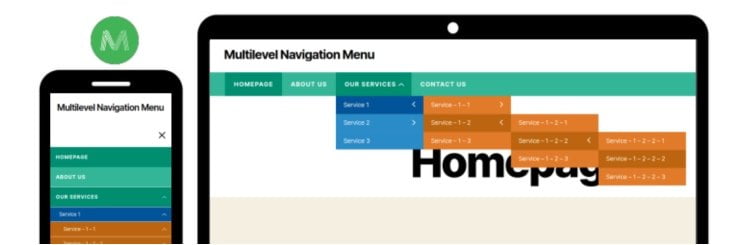
Using the Multilevel Navigation Menu plugin, you can add a full-screen navigation menu to your site with ease. To get started with the creation of a custom WordPress menu with the plugin, ensure that you have hidden the default navigation menu before adding the shortcode.
Highlighted features:
- Full-width or container-width menu;
- Adjust the outer width and inner container left and right spacing of the menu;
- Manage the multi-level menu;
- Set menu background and font color for different menu levels;
- Set the responsive breakpoint of the menu.
Enveil the Full Power of WordPress Navigation Menus
It’s essential to make your WordPress site easy to navigate even for the first-time visitor. Using a robust menu, you can make it easier for your customers to browse the content and reach the needed sections on your site. WordPress comes with usable menus by default. However, you can also create custom menus and manage their location with a plugin or while adding a few lines of code. Thanks to the drag-and-drop page builders, you can create impressive multi-level menus in the drag-and-drop interface. Only choose the plugin that is compatible with the page builder you use and ready to go.