How to Customize WordPress Blog Design
Table of Contents
Table of Contents

It should have a unique style to make your WordPress website stand out and appeal to your readers. Every project is unique and has its audience that will appreciate looking through your updates and using your website’s offers. In most cases, bloggers opt for ready-made web designs that already include all you need to feature on your web portal. However, even when you choose to build a website with a theme, you need to bring a versatile look to its pages using quick customization. Using the following techniques, you’ll see how to customize WordPress blog design on your own.
Pick a New Theme
The easiest tip on how to customize a WordPress blog is to choose a new theme. Luckily, many free and premium designs are available on the Internet, suited for businesses and topics. If you got tired of the current theme installed on your website, you could always opt for a different alternative.
Please keep in mind that switching themes suggests that everything about your current design will also be changed. So, if there are some elements that you’d like to be featured on the new design of your blog, take care of backup in advance.
Add a Favicon to the Browser Tab
A favicon is an image that appears in the browser tab when people visit your website. This little icon can bring a way more personalized look and feel to your WordPress blog. In most cases, websites put the branded logo to the browser tab. The main branded image always remains in the spotlight, thus sticking to people’s minds.

To add a new logo icon, open the WordPress dashboard and navigate Appearance > Customize. Inside the Customizer, come across the Site Identity tab and find the Site Icon option (this is how Favicon in called in WordPress) at the bottom. Next, upload the logo image from your PC and click the Publish button.
WordPress recommends using resizable icons for the Favicon of your website. Web developers also recommend using images sized 512×512 for the Site Icon. It might seem too large, but the icon will be displayed in bookmarks where the icon can show too small. Users can also save your WordPress blog to their Safari home screen, where the Favicon is displayed quite large.
Use Background Images
It seems that the trend of using background images is not popular any longer. However, the technique lets you bring a versatile style to your WordPress blog.
To change the background, navigate to Appearance > Customize >Background Image. The dashboard will show you the option to select the background image for your website. Select an image you wish to use in your website’s background.
Build a Custom Homepage
The homepage of your WordPress blog is where the whole story begins. The majority of your readers will start the browsing session from the front page; that’s why it deserves a custom design. If you are not ready to tweak the code, you can use page builders like Elementor, which lets you build entirely custom pages without tweaking a single line of code.
The drag-and-drop page builder features Free and Pro versions. Once installed on your website, you will see the “Edit with Elementor” button added to your website’s page.
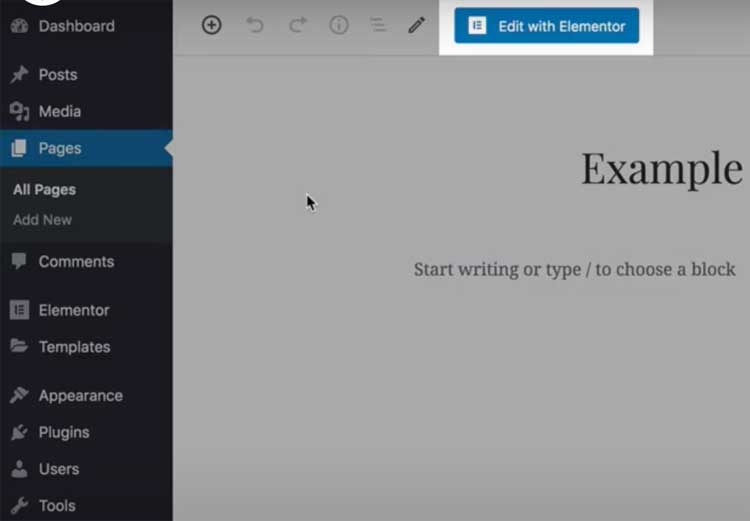
Once you decide to edit the page with Elementor, you will see a screen like this:
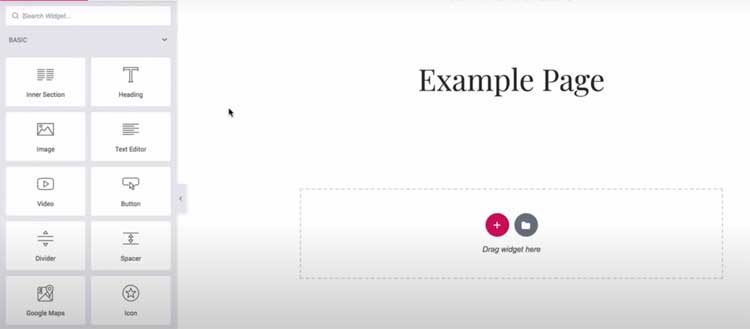
On the left side of the screen, you can find a collection of widgets to drag and drop in the content area. You can choose any element that you wish to be featured on your website’s homepage and apply all necessary visual mode changes.
Pick Branded Colors
Color scheme is one of the essential elements that can bring a unique vibe to your website. Changing the color palette of your WordPress blog, you can create a consistent visual effect that will match your site’s mood and the message that it delivers.
There are many tips on how to customize the WordPress blog color scheme. One of them is using CSS. Every element of your website has its class that you can modify using CSS code. To modify your WordPress blog’s color scheme, you need to know the relevant class and modify the color scheme using the relevant HEX color code.
For example, when you need to change your website’s background color, you can use a CSS snippet like this in your WordPress theme:
background-color: #XXXXXX;
You can also modify the color scheme with WordPress plugins, like Central Color Palette. It is compatible with many popular WordPress plugins and themes. It is also compatible with the Elementor Page Builder. It enables you to change the color palette of your WordPress blog. I
Central Color Pallete lets you modify your theme’s color palette. It integrates well with many popular themes and plugins and lets you skip the process of using the WordPress editor to pick and switch colors. The Central Color Palette plugin also works smoothly with the Beaver Builder and Elementor.
Change Fonts
The choice of fonts for your WordPress blog plays a huge impact on the readability of your content. The selection of typography can also bring a customized look and feel to your project. However, most WordPress themes lack custom fonts. So, you will need to install Google Fonts Typography plugin on your WordPress blog. Once you activate the plugin, you will see a new panel in the WordPress Customizer. With its help, you will be able to change fonts throughout your WordPress blog.
Change the number of posts per page
It’s set as default settings that WordPress highlights ten blog posts on the homepage of your blog and archives, including tags, author, categories, etc. However, you can customize WordPress blog by means of multi-column layouts that you can manage with the Elementor page builder or the WordPress theme that you pick for your blog.
Thanks to the multi-column layout, your reader can look through 16 or 20 blog posts at a time, thus getting a wider choice of topics they can discover on your web resource.
Use infinite scroll instead of pagination
Infinite scroll lets you reveal more posts to your readers when they browse your content. Unlike the pagination, infinite scroll auto-loads posts as a user scrolls down to the bottom of your page.
Different sites use the technique differently. While some offer to load more posts and they navigate your content, others may include the “load more” button after all posts.
Traditionally, there are WordPress plugins that let you add infinite scroll to your blog. One of them is WordPress Infinite Scroll which welcomes more visitors to read your posts and spend a longer time on your WordPress blog.
Display a custom avatar
One more technique that lets you customize WordPress blog is by adding a custom avatar in your bio section. Gravatar is the most popular service that works smoothly with all WordPress-based web resources and lets you add a small thumbnail image to the bio part.
The service is very easy to use. All you need to do is add your valid email address and upload an image that you’d like to be associated with this email. That’s it. Now your Gravatar image will be displayed on all WordPress blogs that support the service.
Add social sharing buttons
There are two ways to integrate social media options to your WordPress blog. One of them is while using social media icons somewhere at the top or bottom of your website, which takes users to your social media profiles and aims to grow your follower base.
Another way to grow your readers’ engagement is by putting social sharing buttons below your blog posts. Whenever a person clicks on such buttons, they will see all information related to the blog posts already filled in. So, all that it takes to spread a word about their preferred article is to click on the share button.
Bottom Line
WordPress blog customization is easier than it seems. Some many tools and themes let you achieve your web resource’s desired effect with the minimum investment of your time and effort. Even when you work with a ready-made WordPress theme, you can bring a customized look and feel to its content worry-free. Popular drag-and-drop page builders and online services can be the best assistants to help you reach your goal.


