Best Practices and Guidelines on How to Build Elementor Contact Page Template

Table of Contents

Many website owners need to pay more attention to the importance of a contact page. This is an element of your website where users come to reach you to get their queries resolved. Since few business owners have the required design and coding skills to update their websites with all required design and functional elements, code-free website building solutions can always become a win-win solution. This blog post provides useful tips on how to create usable contact pages. More specifically, we’ll guide you to create a compelling Elementor contact page template code-free.
Let’s dive in!
Why should your website have a contact page?
As the name implies, the main purpose of a landing page is to provide your website visitors with the required contact details to turn first-time visitors into loyal customers. Every business is unique, and there are several must-follow instructions on how to make a usable and functional contact Elementor contact page template. Check them out.
A contact page should:
- be attractive to appeal to your visitors;
- be built with the end-user in mind;
- facilitate communication between the company and clients;
- provide users with the possibility to submit their requests;
- contribute to SEO.
Contact Page Best Practices
Before we provide guidelines on building effective Elementor contact page templates, let’s consider the following lists of practices to make your contact page work to its full potential.
- Make it easy for customers to find a contact page on your website. One of the best practices for making a contact page more findable is to place a contact us link at the bottom of your website or the footer area.
- Add contact information. Put your phone number, email address, mailing address, and other details your customers can find useful. Basically, this is what people expect to find on the contact page.
- Keep it clutter-free. Avoid adding unnecessary rows and fields that can potentially disturb your audience. The simpler it’s designed, the better.
- Add a success message after submitting a contact form. Oftentimes, users are taken to a page without any message after submitting a contact form. Many users can find it confusing because they need to know if their message has been successfully sent to them.
- Make it interactive. For example, you can integrate the contact page with a Google map widget with a pin of your company’s location.
- Social media has become one of the main communication tools. Does your company run official social media pages? Add social media links to the contact page and ensure they are easy to reach. Create catching designs for social media buttons and put them at the right location.
The best thing about implementing all these practices is that you can implement them into your Elementor contact page template without knowing how to code.
Do’s and Don’ts
When designing an Elementor contact page template, the main don’ts are put as follows:
- Presenting incomplete contact information (like only an email address or a phone number). People should have an opportunity to pick their preferred method to reach you. The more options you provide, your clients will likely stay with your brand.
- Invalid contact information. Avoid errors in numbers, addresses, etc.
- No CTA. What is your goal? Do you want users to fill in a form or request a callback? Make it easy for people to understand what action they should take on your website by writing a clear call-to-action message.
The do’s on how to increase the impact of the contact page are the following:
- Put authentic images of your team members and the office so users can visualize whom they are dealing with.
- Use the contact page to improve your website’s Google ranking. Follow the micro-markup standards.
- Present essential information about your company because many users will land on your contact page.
- Sort out address data and team members’ contacts for different regions and cities.
- If you provide a callback option, ask your website for the most convenient time to reach them.
- Don’t forget about your partners. Make it possible for them to submit documents and files (if it is relevant to you).
How to Build Elementor Contact Page Template
To get started, get the Elementor Page Builder installed and activated. Besides, ensure that you install and activate the free Contact Form 7 plugin. Below, we’ll show how to create a standard Elementor contact page template. You can use it as the basis for your custom page design by enhancing it with all the required widgets and visual or functional elements that you think are the most relevant to your business and audience.
Step 1. Create a new contact form
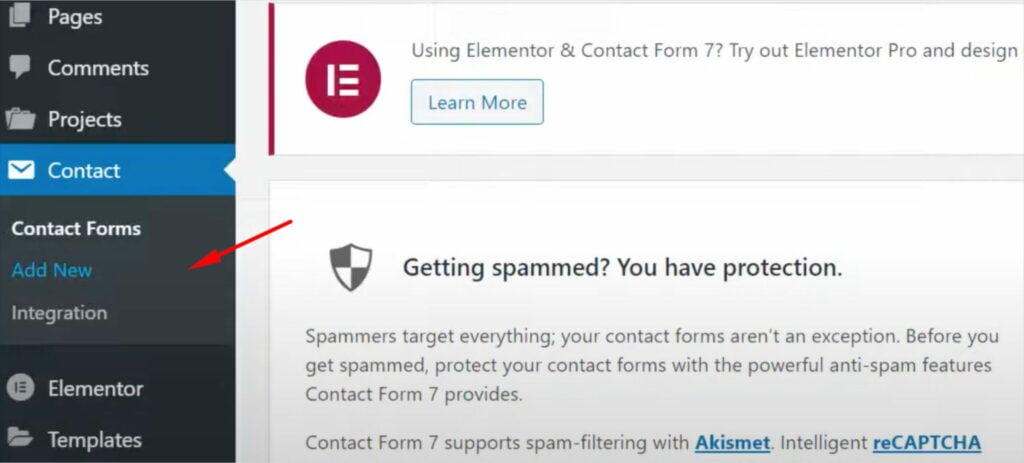
To do this, navigate to Contact > Contact forms in your WordPress dashboard. Click Add New.
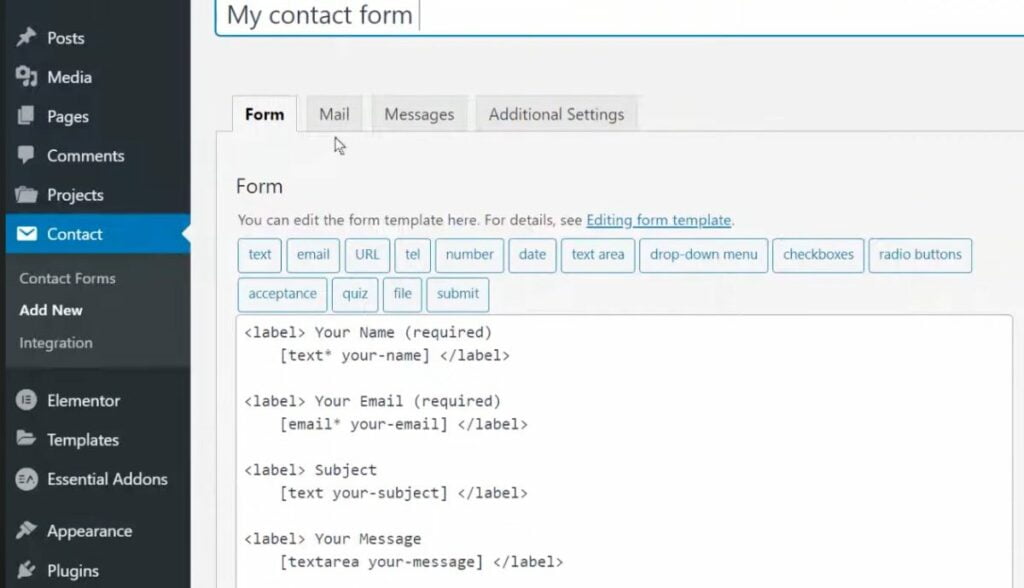
Give a name to your contact form. Specify what fields your contact form will include, like Your Name, Your Email, the Subject of the client’s request, the message, etc. In the Mail tab, specify where the message submitted by the client goes to (either your personal or business email), edit the subject line or leave the default options, and click Save once you finish forking on the contact form settings.
Next, navigate to Contact > Contact Forms, find the one you’ve just created, and copy the shortcode.

Step 2. Create a new contact page
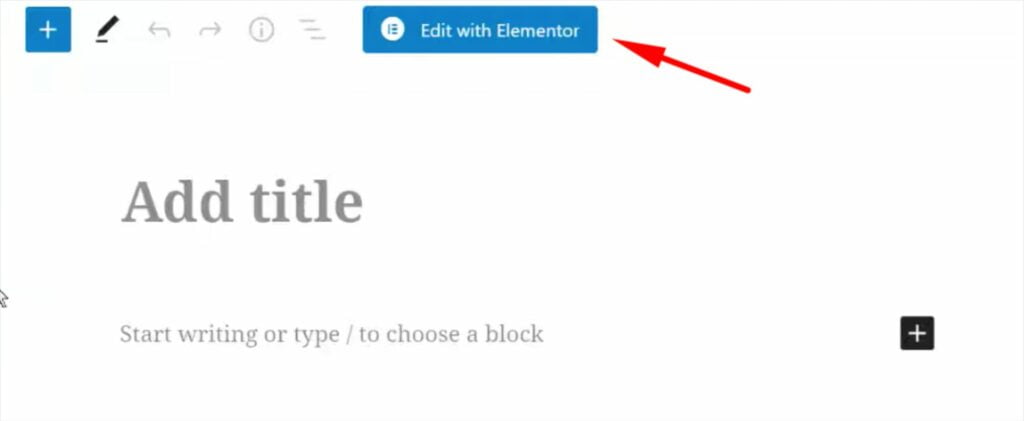
In the WordPress dashboard, click Pages > Add New. A black page will show up. Click Edit with Elementor to be taken to the page builder interface.
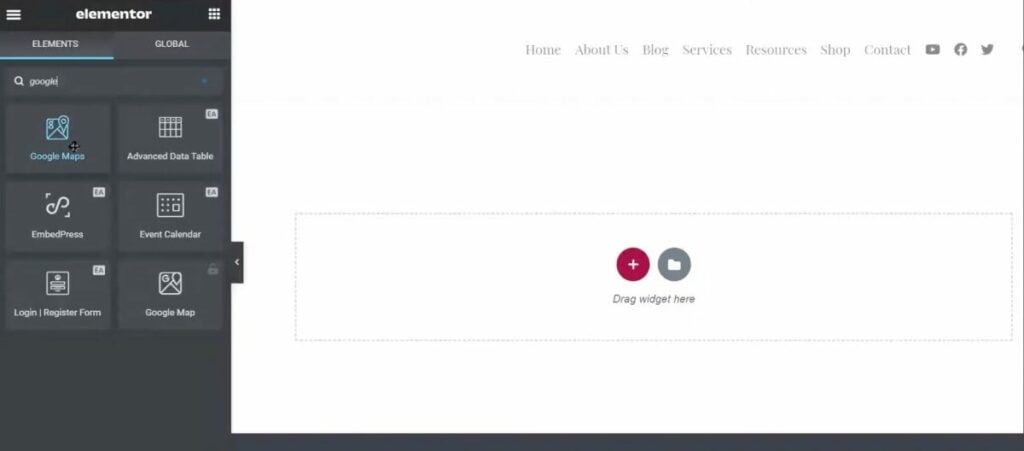
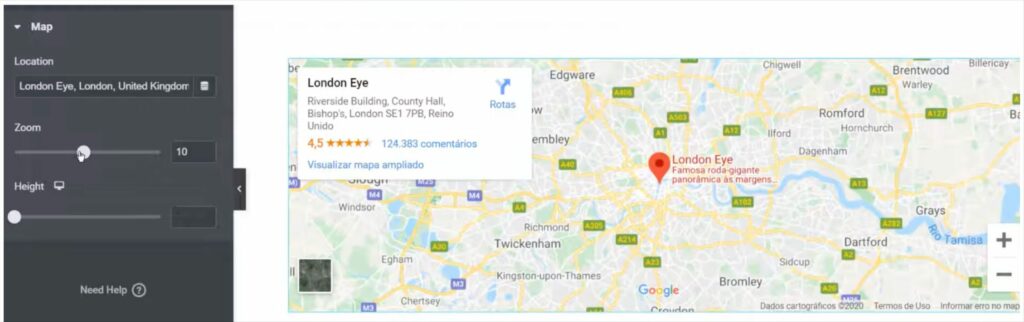
In the left sidebar of the elements menu, type “google.” Drag and drop the Google Maps widget to the Contact Page body.
Enter the location of your office, adjust the zoom and height settings of the map or leave the default settings if this is fine for you.
Step 3. Add a custom contact form to the contact page
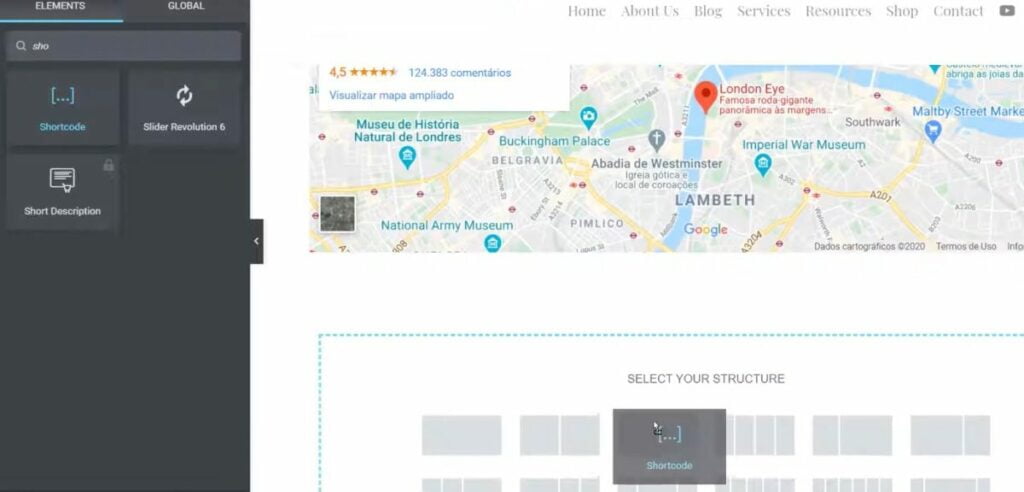
Go back to the elements menu and type “shortcodes” in the search bar. Drag and drop the shortcode element to your contact page.
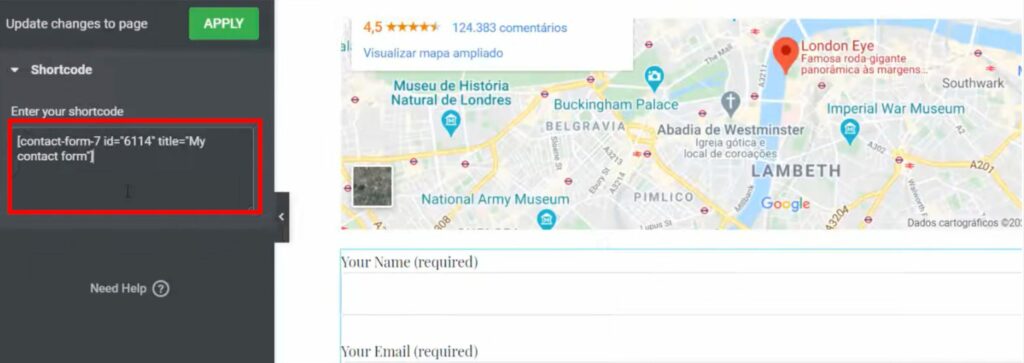
Enter the contact form shortcode that you copied in Step 1.
The page will load the Contact Form 7 we’ve previously created.
In the advanced settings menu, you can set up the margin, padding, and other values so that your contact form looks usable and attractive.
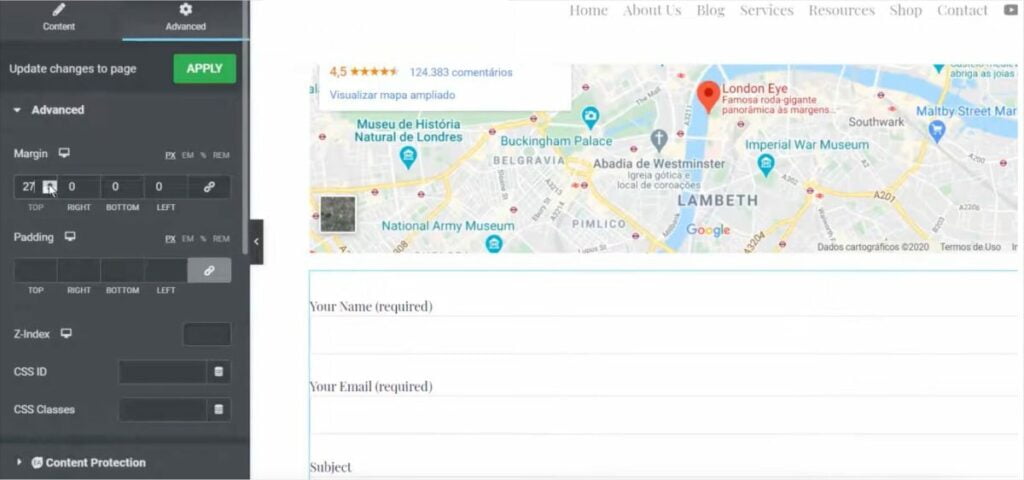
Once done, save the changes and preview them live on your website.
That’s pretty much it about creating a basic Elementor contact page template. Feel free to enhance it with other elements and widgets you find appropriate. Customize your contact page design the way you want, and mind the tips and best practices discussed in this post. Good luck!
If you need professional help with the development of a striking contact page design, the IT Monks team is always happy to create a web product for any purpose and any difficulty for you. Check out the services list and get a quote.


Contact
Don't like forms?
Shoot us an email at [email protected]
