WordPress Post Templates: What They Are and How to Create One

Table of Contents

When you publish a blog post in WordPress, a template determines how that post appears to every visitor; its structure, element placement, and visual design. Most site owners never touch the template, yet it shapes every piece of content they publish. A WordPress post template controls the space between your written content and the layout readers actually see, operating as part of the theme that powers the site.
WordPress post templates define how structure and design are applied to individual posts, covering everything from header placement to metadata display. A WordPress blog post template can be built through the Block Editor or PHP code, and each method produces a layout that WordPress applies independently of your content.
The article ahead explains what a post template is, how WordPress determines which template to use, how to create a custom one using either method, how to customize the default single post template, and where post templates fit alongside page templates and block patterns.
What Is a WordPress Post Template
A WordPress post template is a theme file or block layout that dictates the arrangement and appearance of a blog post. A post template controls the layout and design, thereby determining how elements are displayed on screen for viewers. They are part of the WordPress theme framework and are designed to guarantee consistency in layout and appearance across different blog posts on your website.
Below are some standard features of a post template.
- Header section: consists of the branding, navigation, and/or other global elements at the top of the layout.
- Post title: displays the title of the blog post.
- Featured image: an image associated with the blog post.
- Content: section where the content is displayed.
- Post metadata: post author, category, tag, and/or other details.
- Comments: section where readers make comments on the post.
- Sidebar: side bar column with widgets and/or other content.
- Footer: footer section with global elements.
The post template determines the layout container, but it is filled with the blog post’s actual content.
How WordPress Selects a Post Template
The template hierarchy in WordPress determines which template file renders individual blog posts. The template hierarchy is designed using a fallback principle: WordPress searches for the most specific template first and resorts to more generic templates if no match is found. This procedure applies to both block themes and classic themes, although through different methods of implementing the template hierarchy.
For an individual blog post, WordPress employs the following order of fallback hierarchy:
- Custom Template Assigned WordPress checks whether there is an individually assigned template for that blog post. In the event of a match, WordPress uses that file. When a match is not found, the next fallback level is invoked.
- Single-{Post-Type}.php WordPress searches for the template file that matches the post type (for instance, single-post.php). If the template does not exist, the fallback process is invoked.
- single.php: The default template for rendering individual posts in WordPress. WordPress uses the file if it’s found; if it can’t find one, it moves to another file.
- Singular.php WordPress searches for the template file that can be used for displaying all individual content, including posts and pages. If the file is not found, the fallback process starts.
- index.php This is the default file WordPress uses if none of the other template files match.
As showed above, the WordPress theme hierarchy uses a series of tests to determine which template file to use. Custom templates occupy the most preferred template file position within the hierarchy and override the default options. This makes them the best choice for controlling post appearance.
Block Themes and the Site Editor
Block themes represent the modern WordPress approach to post templates, where blocks replace PHP files as the structural unit. Instead of code files in a theme directory, block themes store each template as block markup: HTML with block comments that define layout, content areas, and structural elements.
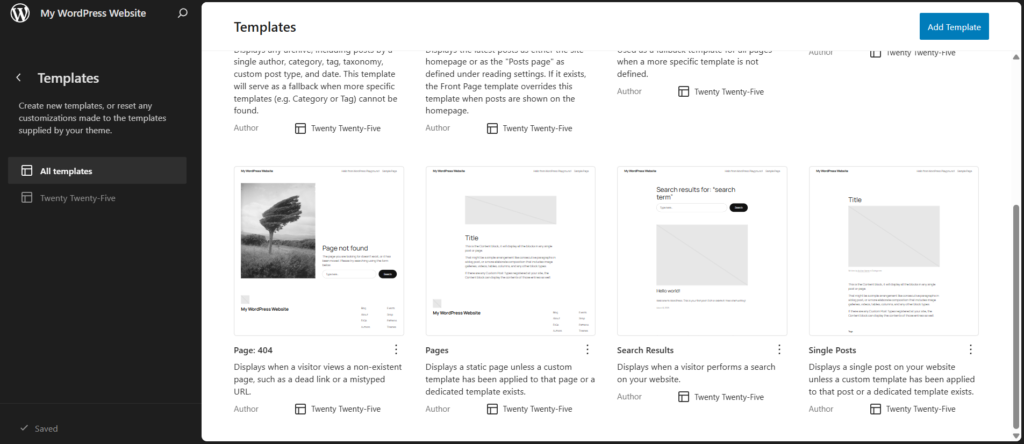
Because these templates are stored as block markup rather than PHP, managing them requires a visual interface instead of a code editor. The WordPress full Site Editor provides that interface for block themes. In the WordPress dashboard, you access post templates through Appearance → Editor → Templates, where the editor displays all available templates. The Templates panel shows entries such as Single Posts, ready for viewing and management in one place.
Within this interface, a post template is presented as a block-based layout. You can navigate to the Single Posts template, open it, and see how blocks define elements like the post title, content, and metadata. The Site Editor replaces direct code editing by allowing you to edit, rearrange, and manage templates visually, without working with PHP files.
Classic Themes and PHP Template Files
The classic theme uses PHP files in the theme folder to determine how content is displayed. Each of these files contains only one view, while the template hierarchy determines which file will be used for a particular request.
In this case, we are talking about the PHP for WordPress, where single.php serves as the WordPress template for displaying a post on your blog if you do not have any other templates. There are two basic approaches the classic theme uses to display posts. Firstly, there is a template tag approach that retrieves specific components of the page through functions such as get_header(), the_content(), and get_footer(). Secondly, there is a WordPress Loop that prepares all required post data for those tags.
A basic single.php contains HTML combined with template tags inside the loop:
<?php get_header(); ?>

<main>

<?php if ( have_posts() ) : while ( have_posts() ) : the_post(); ?>

  <article>

    <h1><?php the_title(); ?></h1>

    <?php the_post_thumbnail(); ?>

    <div>

      <?php the_content(); ?>

    </div>

  </article>

  <?php comments_template(); ?>

<?php endwhile; endif; ?>

</main>

<?php get_sidebar(); ?>

<?php get_footer(); ?>
Inside the loop, each template tag targets a specific part of the page structure:
- get_header() loads the header file
- the_title() outputs the post title
- the_post_thumbnail() displays the featured image
- the_content() outputs the post body
- comments_template() includes the comments section
- get_sidebar() loads the sidebar
- get_footer() loads the footer
Each template tag either loads a file or outputs post data, defining a specific part of the page structure. Classic themes use this pattern consistently; a PHP post template contains template tags within the loop, and the file itself defines how the post is displayed.
How to Create a Custom Post Template in the Block Editor
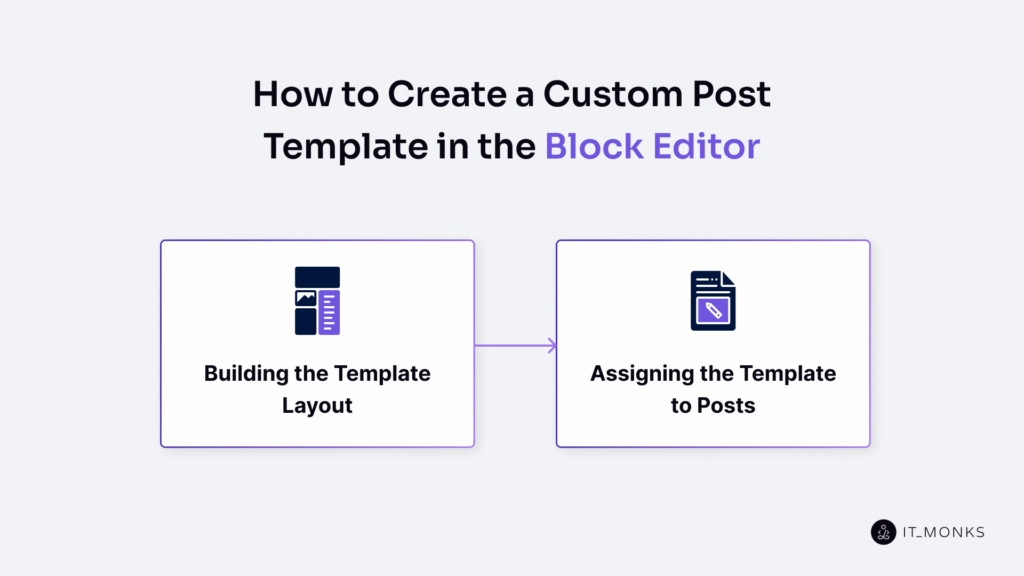
The WordPress Block Editor provides an easy visual interface for creating your own custom post templates without coding. It is also known as WordPress Gutenberg, which gives users a new block interface where you can create layouts without coding. For this method to be effective, you will need to use a block theme because the Site Editor, where all the tools for creating a template are located, works only on block themes. This process consists of two steps: designing the layout and then applying it to posts.
Building the Template Layout
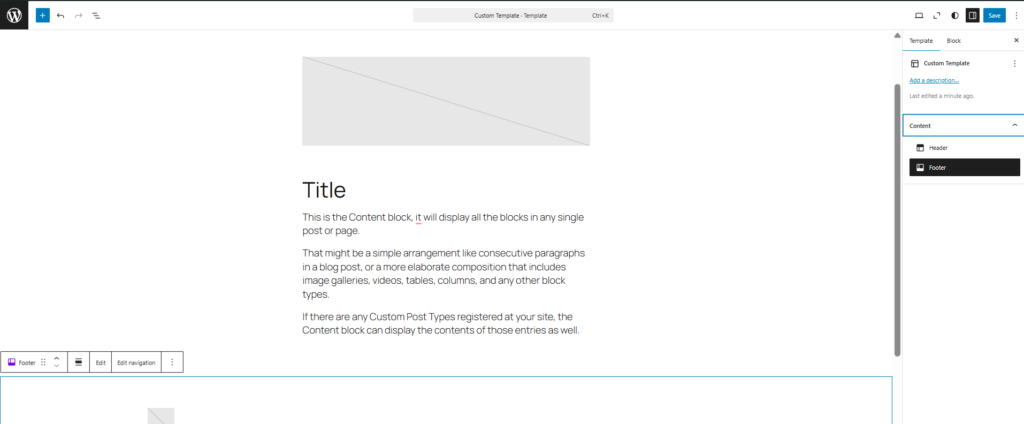
A template layout is the structural arrangement of blocks that determines how a post’s content, metadata, and visual elements are positioned on the page. Building this layout starts in the template editor after you open the creation flow through Appearance → Editor → Templates → Add New. The editor provides a canvas where you construct the template from blocks, and each block displays a specific post element. The block inserter panel lists core post blocks you can select.
You begin by adding the essential post blocks. Use the block inserter to select and place the Post Title, Post Featured Image, and Post Content blocks. These blocks form the core structure, where each block displays its corresponding data from a post. Then add supporting elements such as Post Date, Post Author, and Post Terms to include metadata.
After inserting the blocks, arrange them directly on the canvas. Drag and place each block to define how the template displays content. For example, position the Post Featured Image above or below the Post Title, place metadata near the title or after the content, and decide whether the layout follows a full-width structure or includes a sidebar area.
The template now contains a structured set of blocks that define how a post is displayed. When the layout is set, click Save to store the template so it can be selected and assigned to individual posts.
Assigning the Template to Posts
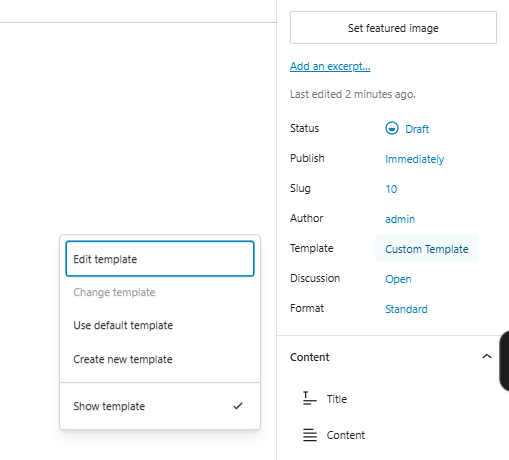
Linking post templates to individual blog posts allows WordPress to use the post template rather than the default template when displaying the post. To link the post to the post template, go to the WordPress post editor and click on the Settings tab on the right sidebar. Within this tab, find the Template section, wherein the drop-down menu will enable you to choose the custom template among the available templates.
The linked template would apply to the individual post and not other posts until other templates are chosen. Your custom template will dictate the way you organize the post contents based on the template’s design, which you can see in the preview view. If your custom template is somehow deleted or not available anymore, your post will go back to the default template.
However, when more capabilities are required for a WordPress post template, PHP can help.
How to Create a Custom Post Template with PHP
The code-based approach is the usual way to develop custom post templates in PHP on WordPress. With the help of the code-based technique, one can be sure of full control over both the process of developing the custom template and its functioning. Using PHP enables the use of WordPress hooks to add custom code that performs operations like adding content before or after a post body without changing the template itself.
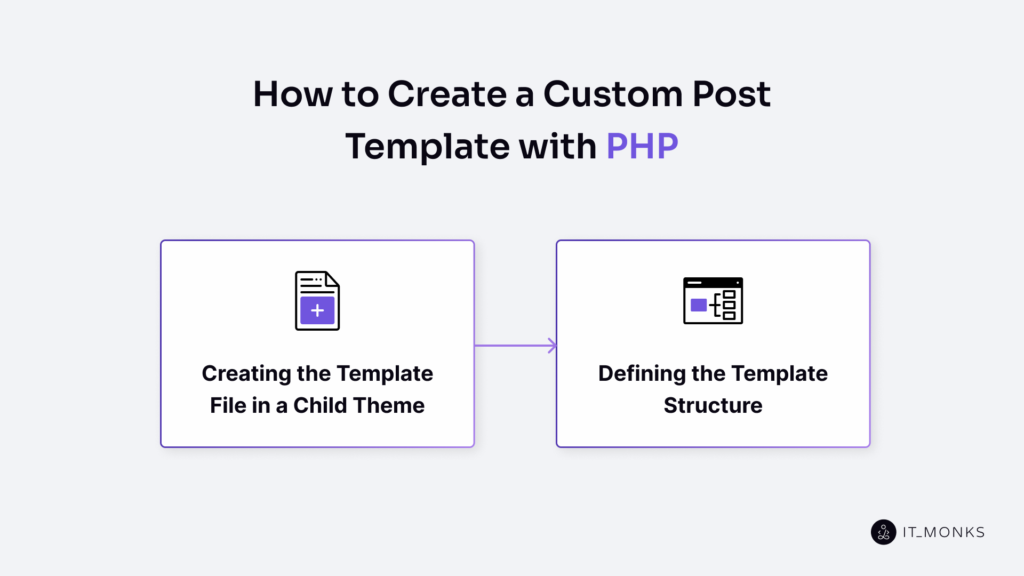
When developing a template, remember to use a child theme; otherwise, it will be lost during WordPress updates, as the parent theme will be overwritten. Two subsections described below show the process of making a template file and structuring the template.
Creating the Template File in a Child Theme
Creating a custom post template with PHP starts with placing the template file inside a child theme. A child theme is required because WordPress does not overwrite child theme files during parent theme updates. Do not modify the parent theme directly. Place the template file in the correct root location of the child theme directory for WordPress to recognize it.
Create a new .php file at the root of the child theme directory (not in a subfolder). The file name should be descriptive, for example: single-custom-post.php.
Inside this file, add a header comment. WordPress scans this header comment when loading theme files to determine whether the file should be registered as a selectable template:
<?php

/*

Template Name: Custom Post Layout

Template Post Type: post

*/
The Template Name line defines the label WordPress uses to register the template, making it selectable in the post editor. The Template Post Type: post line restricts the template to posts, not pages or other content types.
When the file is saved in the child theme root with this header comment, WordPress reads it and makes the template available in the template selection dropdown.
This setup follows the principles outlined in a file and directory structure guide: template files must be placed in the correct root location for WordPress to recognize them.
After registration, the file can be extended by adding the template structure in the next step.
Defining the Template Structure
Defining the template structure means building the template file as a combination of HTML and template tags, where the template controls how post data is loaded and displayed. In practice, the structure comes from HTML wrapper elements, while template tags pull and display the post data inside that markup.
Below is a full working template example:
<?php

get_header();

?>

<main class="custom-post-template">

  <?php if (have_posts()) : while (have_posts()) : the_post(); ?>

      <article id="post-<?php the_ID(); ?>" <?php post_class(); ?>>

          <header class="post-header">

              <h1 class="post-title"><?php the_title(); ?></h1>

              <div class="post-meta">

                  <span class="post-author"><?php the_author(); ?></span>

                  <span class="post-date"><?php echo get_the_date(); ?></span>

                  <span class="post-categories"><?php echo get_the_category_list(', '); ?></span>

                  <span class="post-tags"><?php echo get_the_tag_list('', ', '); ?></span>

              </div>

          </header>

          <div class="post-thumbnail">

              <?php the_post_thumbnail(); ?>

          </div>

          <div class="post-content">

              <?php the_content(); ?>

          </div>

      </article>

      <section class="post-comments">

          <?php comments_template(); ?>

      </section>

  <?php endwhile; endif; ?>

</main>

<?php

get_footer();

?>
The template file combines structure and data through specific functions.
- get_header() loads the header file and includes the top part of the layout.
- the_post_thumbnail() displays the featured image assigned to the post inside its wrapper.
- the_content() outputs the full post body within the content container.
- the_title() outputs the post title inside the heading element.
- the_author() outputs the author name, and get_the_date() returns the publication date.
- get_the_category_list() returns the category list, while get_the_tag_list() returns the tag list.
- comments_template() loads the comments section for the post.
- get_footer() loads the footer file and closes the template structure.
The WordPress loop (have_posts() / the_post()) sets up the global post object so that template tags reference the correct post data. Without the loop, template tags would not access the current post.
HTML wrapper elements define the layout structure and provide hooks for further customization. You can change these wrappers, reorder sections, or remove elements to control how the post is rendered.
At this stage, the template file defines how a single post is displayed and connects to the template hierarchy, where WordPress selects this file when it is assigned to a post.
Customizing the Default Single Post Template
Modifying a WordPress post page template would require modification of the layout that dictates the appearance of all posts on the website blog, and not designing a completely new template. This method of designing templates is adopted in situations where the standard layout requires only limited changes.
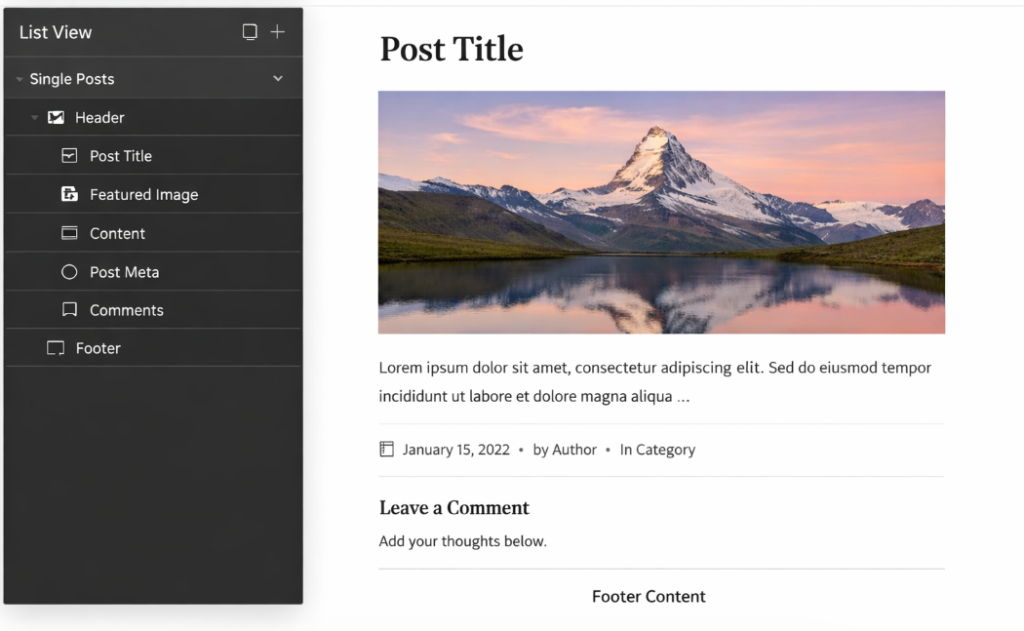
To access it, go to Appearance → Editor → Templates → Single Posts in the Site Editor. This opens the default single post template, where you can edit its structure directly.
In the Site Editor, the List View displays the template’s block hierarchy. The List View panel includes elements such as Header, Post Title, Featured Image, Content, Post Meta, Comments, and Footer. These blocks show how content is organized and where each part is placed. You can directly modify the template structure by editing or rearranging it.
The default single post template supports several common modifications:
- removing elements like a sidebar or post meta
- adding blocks such as a related posts section or a call-to-action
- rearranging blocks to change content order
- adjusting layout width and spacing
These changes apply to the default template and affect all posts that use it.
If needed, you can reset the template to restore its original state provided by the theme.
Post Templates vs Page Templates vs Block Patterns
WordPress post templates, page templates, and block patterns each control a different layer of how content appears, and the distinction comes from what they target, what scope they cover, and how they are assigned. Understanding where a post template ends and these related features begin helps avoid misapplying the wrong tool.
| Feature | Post Template | Page Template | Block Pattern |
|---|---|---|---|
| Purpose | Controls the full page layout of posts | Controls the full page layout of pages | Reusable arrangement of blocks inserted into content |
| How Created | Site Editor (block themes) or PHP file (classic themes) | Site Editor (block themes) or PHP file (classic themes) | Block Editor → save as pattern |
| Assigned To | Individual posts or all posts via default | Individual pages or all pages via default | Inserted manually into any post or page content |
| Scope | Entire post layout (header to footer) | Entire page layout (header to footer) | Section-level (partial layout) |
| Best For | Blog design consistency across the site | Unique page structures (landing pages) | Repeatable content sections (CTAs, testimonials, feature grids) |
Post templates and page templates both control full-page layout from header to footer, but they target different content types: posts and pages, respectively. A page template serves as the page-level equivalent for static content such as contact or landing pages.
Block patterns differ from both: a block pattern is a reusable arrangement of blocks that covers only a partial section of a layout, inserted within the content rather than assigned as a full-page structure.
Custom Post Type templates follow the same template hierarchy but use type-specific file names such as single-{post-type}.php to target content types like portfolios or products.
A WordPress post template is the right choice when the goal is a consistent layout across blog posts. Page templates suit pages that require a distinct full-page structure. Block patterns serve when only a reusable section is needed inside content.
Regardless of theme type, a WordPress post template controls how every blog post is displayed, and the Block Editor or PHP method covered above gives you the tools to build one.
Contact
Don't like forms?
Shoot us an email at [email protected]
