WordPress Administrator: Role, Capabilities, and Management
Table of Contents
The WordPress Administrator role controls every aspect of a single-site WordPress installation. Content publishing, plugin management, theme configuration, user accounts, and core updates all fall within its scope.
This article breaks down what the Administrator role includes, how to add or remove Administrator accounts, and how the role compares to Editor and Super Admin. It also covers security practices that protect Administrator-level access from common threats.
What Is the WordPress Administrator Role?
The WordPress Administrator role includes all registered capabilities available in a single-site setup. At the data level, the WordPress Administrator role is stored in wp_options as part of the serialized wp_user_roles array. Each role is just a structured list of capabilities, and Administrator contains the full set by default, usually 70+ of them, depending on the environment and any added custom permissions.
WordPress checks each capability through current_user_can(). Every time an action is triggered (editing a post, activating a plugin, changing a setting), the system evaluates whether that capability exists for the role. If it’s there, the action proceeds. If not, it stops right there.
In practice, this ties into broader WordPress user management, where roles and permissions shape what each account can access or modify.
The Administrator role includes and governs several functional areas. Content is organized into one group (posts, pages, media). Then there’s appearance: themes, menus, widgets. Plugins form their own layer alongside user accounts, site-wide settings, and core updates. All of these are covered under the same capability set, without separation.
On the hierarchy side, the Administrator role sits above Editor but below Super Admin, which only appears in multisite environments.
How to Log In as a WordPress Administrator
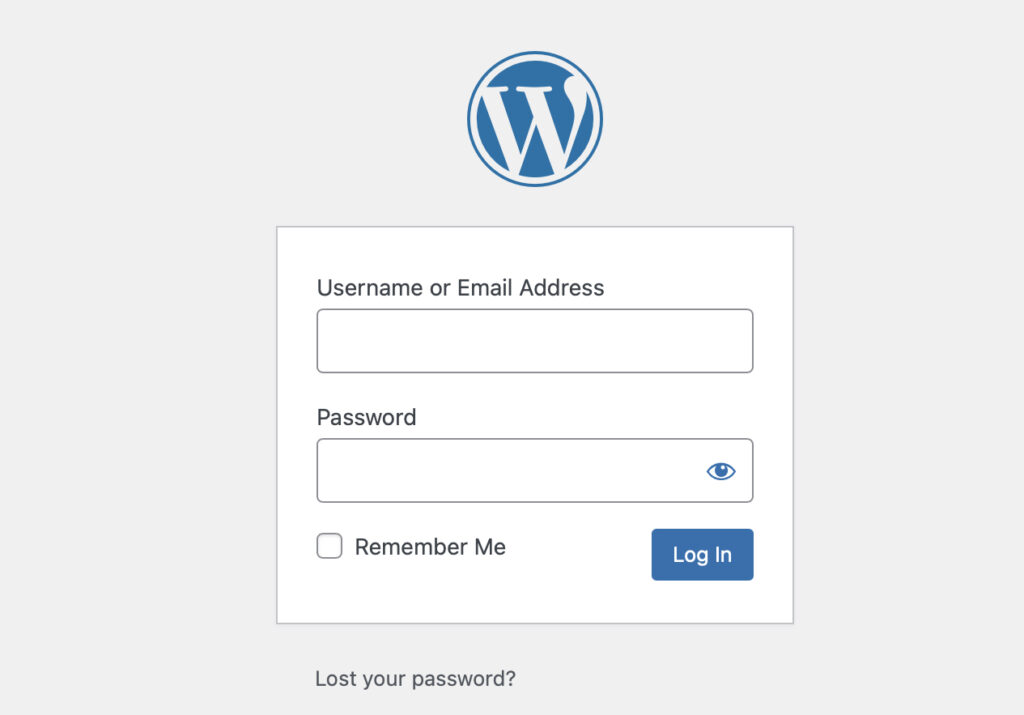
The WordPress Administrator login is accessed through two standard entry points: /wp-admin and /wp-login.php. Both lead to the same place, but they behave a bit differently on first contact.
- /wp-admin points to the dashboard area. If the request comes in without authentication, it redirects straight to /wp-login.php. That file serves as the authentication gateway: credentials are submitted, access is evaluated, and only then does the dashboard load.
- /wp-login.php handles the actual authentication flow. Username, password, and session cookies are all processed there. Once verified, it routes the session back to /wp-admin, granting access.
Some setups don’t expose these default paths. A custom login URL might replace them, typically via security plugins such as WPS Hide Login or Solid Security. In those cases, /wp-login.php and /wp-admin won’t respond as usual, which can throw people off if they’re expecting the default behavior. If there’s any doubt about whether an Administrator account exists, WP-CLI clears that up quickly. Running:
wp user list --role=administratorreturns every account assigned to that role. No guessing, no digging through the UI.When access is lost, recovery falls into a few common paths. The email-based password reset is the first stop. If that fails or email isn’t available, the wp_users table in phpMyAdmin can be updated directly. The password field accepts an MD5 hash. WP-CLI works here too, using wp user update to reset credentials without manually touching the database.
How to Add a New WordPress Administrator
Method 1: Add Administrator via WordPress Dashboard
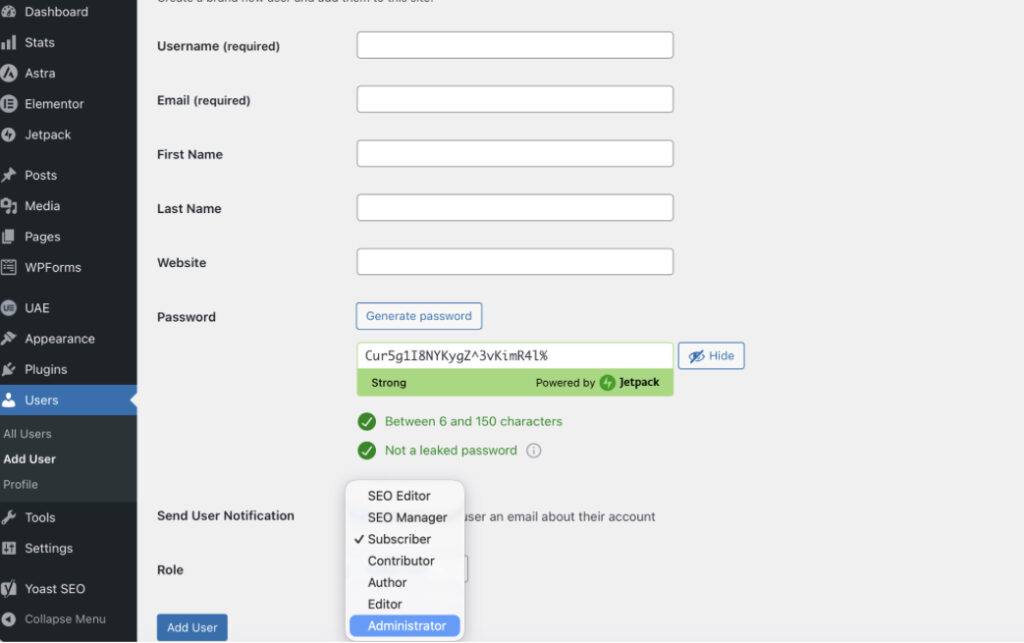
Adding a new Administrator from the dashboard takes little time, but a couple of details matter. Start by going to Users → Add New. That section opens the Add New User form where everything happens.
The form requires a username and an email address. The username stays fixed after creation, no edits later, so it’s worth pausing for a second before entering it. WordPress checks it right away, and if it already exists, it won’t accept it.
Further down, the role dropdown defines access. Selecting Administrator assigns the full set of administrator capabilities tied to the role–capability structure. Once that’s set, the account inherits those permissions immediately after creation.
Password handling is partly automatic. WordPress generates one by default, though a custom value can be entered if needed. After submitting the form, the system creates the account and sends an email notification with login details.
If you’re already working in the admin dashboard, this whole process is just a quick pass through a single screen.
Method 2: Add Administrator via WP-CLI
For setups with server access, WP-CLI handles this without touching the dashboard. It’s quicker in some cases, especially when working across multiple environments or scripts.
Creating a new administrator account uses:
wp user create username [email protected] --role=administratorWP-CLI accepts the username, email, and role flag on a single line and creates the account with administrator permissions.
If the user already exists and just needs elevated access, the role can be updated instead:
wp user set-role username administratorThat command promotes the existing account to Administrator without recreating anything.
This approach depends on SSH access and a working WP-CLI setup. It’s often used in staging environments or automated workflows where manual steps slow things down.
Method 3: Add Administrator via phpMyAdmin
The phpMyAdmin method creates an Administrator directly in the WordPress database. This is a recovery technique. Use it when both the dashboard and WP-CLI are unavailable, such as after losing access to every existing Administrator account.
Access phpMyAdmin through the hosting control panel (cPanel, Plesk, or the hosting provider’s custom interface). Back up the database before making any changes.
Step 1: Open the wp_users table and insert a new row with these values:
| Field | Value |
|---|---|
| user_login | new_admin_username |
| user_pass | MD5 hash of the password |
| user_email | [email protected] |
| user_registered | Current date in YYYY-MM-DD HH:MM:SS format |
| user_status | 0 |
| user_nicename | new_admin_username |
| display_name | Display Name |
Note the auto-generated ID value after inserting the row (the next step requires it).
Step 2: Open the wp_usermeta table and insert two rows:
| umeta_id | user_id | meta_key | meta_value |
|---|---|---|---|
| (auto) | [new user ID] | wp_capabilities | a:1:{s:13:”administrator”;b:1;} |
| (auto) | [new user ID] | wp_user_level | 10 |
The wp_capabilities value is a serialized PHP array that maps directly to the Administrator role. The wp_user_level value of 10 corresponds to the Administrator tier in WordPress’s legacy role-level system.
If the WordPress installation uses a custom table prefix (something other than wp_), replace wp_ in both wp_capabilities and wp_user_level with the actual prefix. Check wp-config.php for the $table_prefix value.
The MD5 hash inserted in Step 1 is temporary. WordPress detects the MD5 format on first login and automatically rehashes the password using phpass, its standard hashing library. No manual conversion is needed.
How to Remove or Change an Administrator
Demoting or removing an Administrator account depends on whether the goal is to reduce access or delete the account entirely.
To change an Administrator’s role: Navigate to Users, select the account, and choose a new role from the Role dropdown. Click Update User. The change takes effect immediately; the demoted user loses all Administrator capabilities on their next page load.
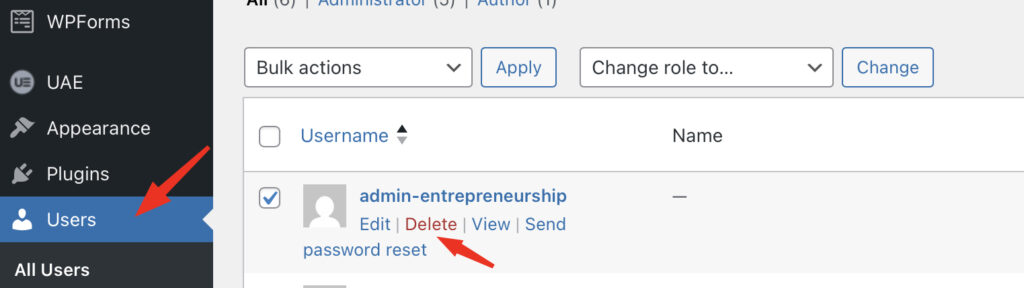
To delete an Administrator account: Hover over the username in the Users list and select Delete. WordPress presents two options: delete all content created by that user, or reassign it to another account. Always reassign content to preserve published posts and pages. Click Confirm Deletion to complete the removal.
WP-CLI supports both operations. To demote an Administrator to Editor:
wp user set-role johndoe editorTo delete an account and reassign its content to user ID 1:
wp user delete johndoe --reassign=1WordPress enforces one hard constraint: at least one Administrator account must exist at all times. The system blocks any attempt to delete or demote the last remaining Administrator. If a site needs a role change for the sole admin, create a second Administrator account first, then modify the original.
Administrator vs Editor in WordPress
The Administrator and Editor roles share full content management capabilities. Both can create, edit, publish, and delete any post or page on the site. Both can moderate comments, manage categories and tags, and upload media. The difference lies entirely in system-level access.
| Capability Area | Administrator | Editor |
|---|---|---|
| Content management (all posts, pages, comments) | ✓ | ✓ |
| Media Library (upload, edit, delete) | ✓ | ✓ |
| Categories and tags | ✓ | ✓ |
| Plugin installation and management | ✓ | ✗ |
| Theme installation and configuration | ✓ | ✗ |
| User account management | ✓ | ✗ |
| Site settings (General, Reading, Permalinks) | ✓ | ✗ |
| WordPress core updates | ✓ | ✗ |
The Editor role is the correct assignment for team members who manage content but should not modify plugins, themes, users, or site settings. Blog managers, senior writers, and content directors typically need Editor access. Giving these users the Administrator role introduces unnecessary risk: an accidental plugin deletion or settings change can break the entire site.
The principle of least privilege applies directly here. Default to Editor for any content-focused team member. Assign Administrator only when the user specifically needs to install plugins, change themes, manage other user accounts, or update WordPress core.
Administrator vs Super Admin in WordPress Multisite
The Super Admin role exists only within WordPress Multisite and provides a different level of control than a regular Administrator. Instead of working within a single site, Super Admin operates at the network level, managing multiple sites from a single location.
That control comes through a set of network-level capabilities. Actions like manage_network, manage_sites, manage_network_users, manage_network_plugins, manage_network_themes, and manage_network_options sit exclusively with Super Admin. These aren’t available on standard installations, and they don’t show up for regular site administrators either.
In a typical multisite setup, access to the Network Admin dashboard is what sets things apart. It runs under /wp-admin/network/, and that’s where all network-wide decisions are handled: plugin availability, theme access, user assignments across sites, and general network settings.
If you’re working with something like a WordPress multisite setup, the distinction becomes pretty obvious. One role handles the whole system, the other stays limited to a single site inside it.
The WordPress Administrator role still exists in multisite, but it doesn’t carry the same reach as it does on a standalone install. By default, plugin and theme installation are restricted. Those options are controlled at the network level, usually through Network Settings.
So even though an Administrator can manage content, users, and settings within their own site, certain areas remain locked unless the network configuration is configured to open them. That boundary is intentional. It keeps control centralized while still allowing each site to be managed independently within its own space.
WordPress Administrator Security Best Practices
Every Administrator account represents the highest-privilege access point on a WordPress site. Compromising a single Administrator account gives an attacker full control. These practices reduce that risk.
Limit the number of Administrator accounts. Most sites need one or two: the site owner and a lead developer. Every additional Administrator account expands the attack surface. Assign Editor, Author, or Contributor roles to team members who do not need system-level access.
Use strong, unique passwords. WordPress hashes passwords with phpass, but the hash is only as secure as the password itself. Use a minimum of 16 characters generated by a password manager. Never reuse a password from another service.
Enable two-factor authentication. WordPress 5.6 introduced application passwords for REST API authentication, but dashboard login requires a plugin for 2FA. Plugins like WP 2FA or Wordfence add time-based one-time passwords (TOTP) that require a second verification step in addition to the password.
Change the default “admin” username. Older WordPress installations and some one-click installers still create the first account with “admin” as the username. Automated brute-force attacks target this username first. Create a new Administrator account with a unique username, reassign all content to it, then delete the “admin” account.
Enforce HTTPS for the admin area. Adding this constant to wp-config.php forces SSL on every admin page:
define('FORCE_SSL_ADMIN', true);This prevents credentials from transmitting over unencrypted connections.
Disable the dashboard file editor. The built-in theme and plugin editors let Administrators modify PHP files directly from the browser. Adding this line to wp-config.php removes the editors entirely:
define('DISALLOW_FILE_EDIT', true);Limit login attempts. WordPress does not restrict failed login attempts by default. Server-level tools like fail2ban or plugins like Limit Login Attempts Reloaded block IP addresses after repeated failures, stopping brute-force attacks before they succeed.
Audit Administrator accounts regularly. Review the Users list quarterly. Remove accounts for former team members, contractors whose projects ended, and any account that has not logged in within 90 days. Demoting inactive Administrators to Subscriber preserves their account data without maintaining elevated access.
Full List of Administrator Capabilities
The Administrator role holds capabilities across five functional categories. The table below lists every default capability and what it controls.
Content Management
| Capability | Function |
|---|---|
| edit_posts | Create and edit own posts |
| edit_others_posts | Edit posts created by any user |
| edit_published_posts | Modify posts after publication |
| publish_posts | Publish new posts |
| delete_posts | Remove own draft posts |
| delete_others_posts | Remove posts created by any user |
| delete_published_posts | Remove posts after publication |
| read_private_posts | View posts marked as private |
| edit_private_posts | Modify posts marked as private |
| edit_pages | Create and edit own pages |
| edit_others_pages | Edit pages created by any user |
| edit_published_pages | Modify pages after publication |
| publish_pages | Publish new pages |
| delete_pages | Remove own draft pages |
| delete_others_pages | Remove pages created by any user |
| delete_published_pages | Remove pages after publication |
| read_private_pages | View pages marked as private |
| edit_private_pages | Modify pages marked as private |
| manage_categories | Create, edit, and delete categories and tags |
| moderate_comments | Approve, edit, and delete comments on any post |
| upload_files | Add images, documents, and media to the Media Library |
| unfiltered_upload | Upload file types not included in the default allowed list |
Themes and Appearance
| Capability | Function |
|---|---|
| switch_themes | Activate a different theme |
| edit_themes | Modify theme files through the dashboard code editor |
| install_themes | Add new themes from the repository or uploaded files |
| update_themes | Apply available theme updates |
| delete_themes | Remove installed themes |
| edit_theme_options | Configure menus, widgets, background, header, and Customizer settings |
Plugin Management
| Capability | Function |
|---|---|
| activate_plugins | Turn installed plugins on or off |
| install_plugins | Add new plugins from the repository or uploaded files |
| edit_plugins | Modify plugin files through the dashboard code editor |
| update_plugins | Apply available plugin updates |
| delete_plugins | Remove installed plugins |
User Management
| Capability | Function |
|---|---|
| list_users | View all registered user accounts |
| create_users | Add new user accounts |
| edit_users | Modify any user’s profile, email, and role |
| delete_users | Remove user accounts from the site |
| promote_users | Change the role assigned to any user |
Settings and Maintenance
| Capability | Function |
|---|---|
| manage_options | Access and modify all entries under the Settings menu (General, Reading, Writing, Discussion, Permalinks, Privacy) |
| update_core | Install WordPress core updates |
| export | Download site content as an XML file |
| import | Upload content from an XML export file |
| unfiltered_html | Use HTML and JavaScript in posts, pages, and widgets without sanitization |
Plugins can register additional custom capabilities beyond this default set. WooCommerce, for example, adds capabilities such as manage_woocommerce and edit_products that apply only when the plugin is active.

Contact
Don't like forms?
Shoot us an email at [email protected]