Explore our specialized services, tailored solutions, and industry expertise to elevate your digital presence. From custom WordPress development to seamless integrations, we build high-performing websites that deliver impact.
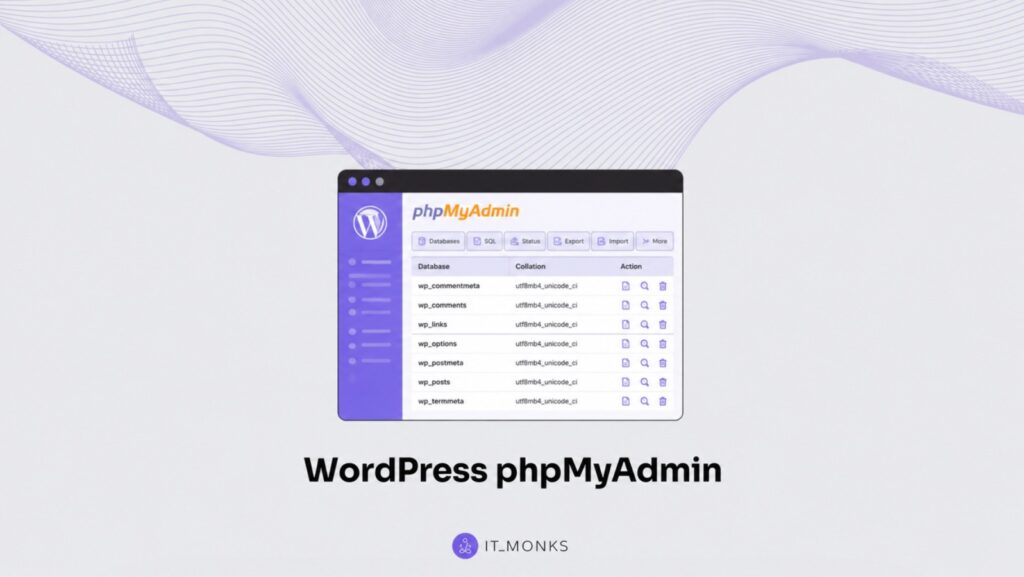
phpMyAdmin is the browser-based tool that WordPress site owners, developers, and administrators use to access and manage the WordPress database stored in MySQL or MariaDB, making it the starting point for anyone learning to use phpMyAdmin and work directly with site data.
As a database administration tool, phpMyAdmin provides a graphical interface for viewing and modifying the WordPress database, while practitioners typically access it through a hosting dashboard, a cPanel account, or a locally provisioned development environment.
This guide covers what the tool is, how to open it, how to install it for local development when needed, and the WordPress database objects it operates on, including the core wp_ tables. Database access workflows, optimization tasks, and repair procedures are covered separately so this introduction stays focused on the essential scope of WordPress phpMyAdmin.
What Is phpMyAdmin?
phpMyAdmin is a browser-based graphical interface for viewing and changing a WordPress site’s MySQL or MariaDB database. It runs as a web application on the server, which means it loads in a browser tab like any website and presents the database through screens and buttons instead of typed commands.
The same database that the WordPress front end reads from and writes to is what phpMyAdmin opens, only rendered visually: rows become table grids, settings become editable cells, and a structured query becomes something typed into a box and run with a click.
That visual nature is what sets the tool apart from the other two ways to touch a WordPress database. WP-CLI drives the database from the command line, where every change is a typed instruction and nothing is shown until requested. Editing the database in code, inside a plugin or a custom script, hides the data behind PHP functions and SQL statements that a developer writes by hand.
phpMyAdmin reaches the identical MySQL or MariaDB database as both of those, but it does the reaching through a point-and-click front end, which is why it suits site owners and editors who want to see the data before they change it.
A first look at the tool tends to land on a handful of recurring parts:
phpMyAdmin presents a WordPress database through four areas that appear on nearly every screen.
A login screen that takes the database username and password before anything else loads.
A database and table list down the left side, where the WordPress database and its individual tables sit ready to open.
An SQL query tab for typing and running a database command directly when a click cannot do the job.
Export and import tabs for pulling a copy of the database out as a file or loading one back in.
WordPress hosts almost always provide phpMyAdmin already wired to the site’s database, which is what makes opening it the natural next step.
How to Access phpMyAdmin
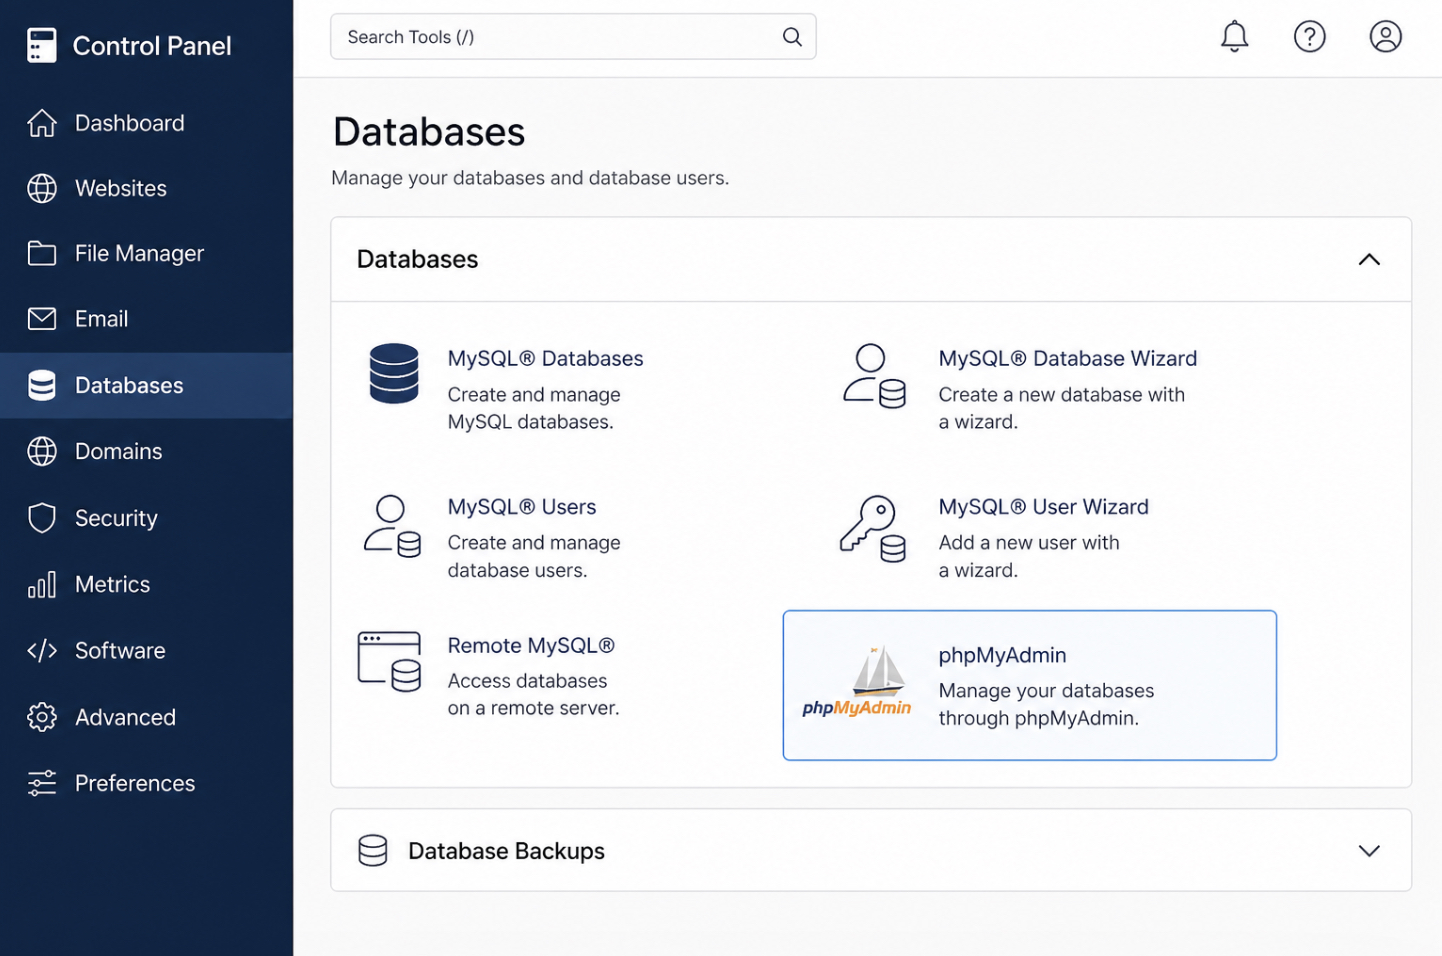
Accessing phpMyAdmin means opening the already-installed tool that most WordPress hosts provide through their control panel. The vast majority of managed WordPress plans and shared hosting accounts bundle phpMyAdmin into the hosting interface, so opening it rarely involves an install at all.
Two routes lead to the same place. A traditional shared host exposes it inside cPanel, and a managed-WordPress host exposes it inside its own dashboard, yet both routes finish on the identical phpMyAdmin screen with the WordPress database ready to select.
The hosting control panel groups database tools together, usually under a heading such as Databases, and the phpMyAdmin entry sits inside that group as a labelled icon.
Opening the tool follows the same short path on either route:
Log in to the hosting control panel, whether that is cPanel or a managed-WordPress dashboard.
Find the database section, typically the Databases group, and click the phpMyAdmin icon.
Launch phpMyAdmin, which loads in a new browser tab on its own login or directly on its main screen.
Select the WordPress database from the list on the left to see its tables.
Opening the tool and working through the full database-side procedure are two different things. Opening the tool lands on the phpMyAdmin screen with the database selected; the complete entry-point procedure to access the WordPress database with phpMyAdmin (finding the correct database name in the configuration, confirming credentials, and reading the data safely) runs as its own guide.
With the tool open and the database selected, the remaining routes cover provisioning phpMyAdmin where the host does not hand it over: a manual install for local WordPress development and a plugin that brings database access inside the WordPress admin screens.
How to Install phpMyAdmin for a Local WordPress Site
Installing phpMyAdmin for a local WordPress site means adding the browser-based database tool to a WordPress copy that runs on a developer machine or a self-managed WordPress host, where no host control panel already exposes it. On managed WordPress hosting the tool ships ready to open.
A local WordPress dev environment is different. There the database engine and the WordPress files sit on the same machine a developer controls directly, and nothing hands over a pre-built link to phpMyAdmin, so the tool has to be installed and pointed at the local WordPress database by hand.
This route stays inside the WordPress frame the whole way. A self-install produces a working database panel for one local WordPress install, not a production server stack assembled from scratch. Most local WordPress dev environments already bundle phpMyAdmin alongside the bundled database, which turns the install into little more than enabling and launching a panel that came with the toolkit.
A self-managed WordPress host follows the same shape: download phpMyAdmin, place it where the WordPress database engine can reach it, and open it in a browser.
A local WordPress dev environment exposes its database panel with a phpMyAdmin button (often labelled phpMyAdmin or Adminer next to the database service), which launches the tool against the bundled local WordPress database.
Installing and launching phpMyAdmin for a local WordPress site takes four steps.
Open the local WordPress dev environment (or the dashboard of the self-managed WordPress host) and locate the database service that backs the WordPress install.
Enable or download the bundled phpMyAdmin panel for that database service; in most local toolkits it ships alongside the engine and only needs to be switched on.
Launch phpMyAdmin from the database panel, the local environment opens it in a browser and signs it in against the local database credentials.
Select the local WordPress database in the left-hand list so the tool operates on the right schema rather than a system database.
Once phpMyAdmin opens and points at the local WordPress database, the tool behaves exactly as it does on a managed host: the same panels, the same table list, the same query surface. A local WordPress dev environment or a self-managed host is one way to reach that surface when the hosting account exposes no control panel. A WordPress plugin is the other, and it does the same job without touching the server at all.
How to Install a phpMyAdmin Plugin in WordPress
A phpMyAdmin plugin in WordPress is a plugin that exposes database admin inside wp-admin, so the database can be browsed and changed from the WordPress dashboard itself rather than through a host control panel. The tool most site owners know as phpMyAdmin runs at the hosting layer. A database-admin plugin brings an equivalent surface one layer up, into wp-admin, which matters when the hosting account hands over no control panel and self-installing on the server is not an option.
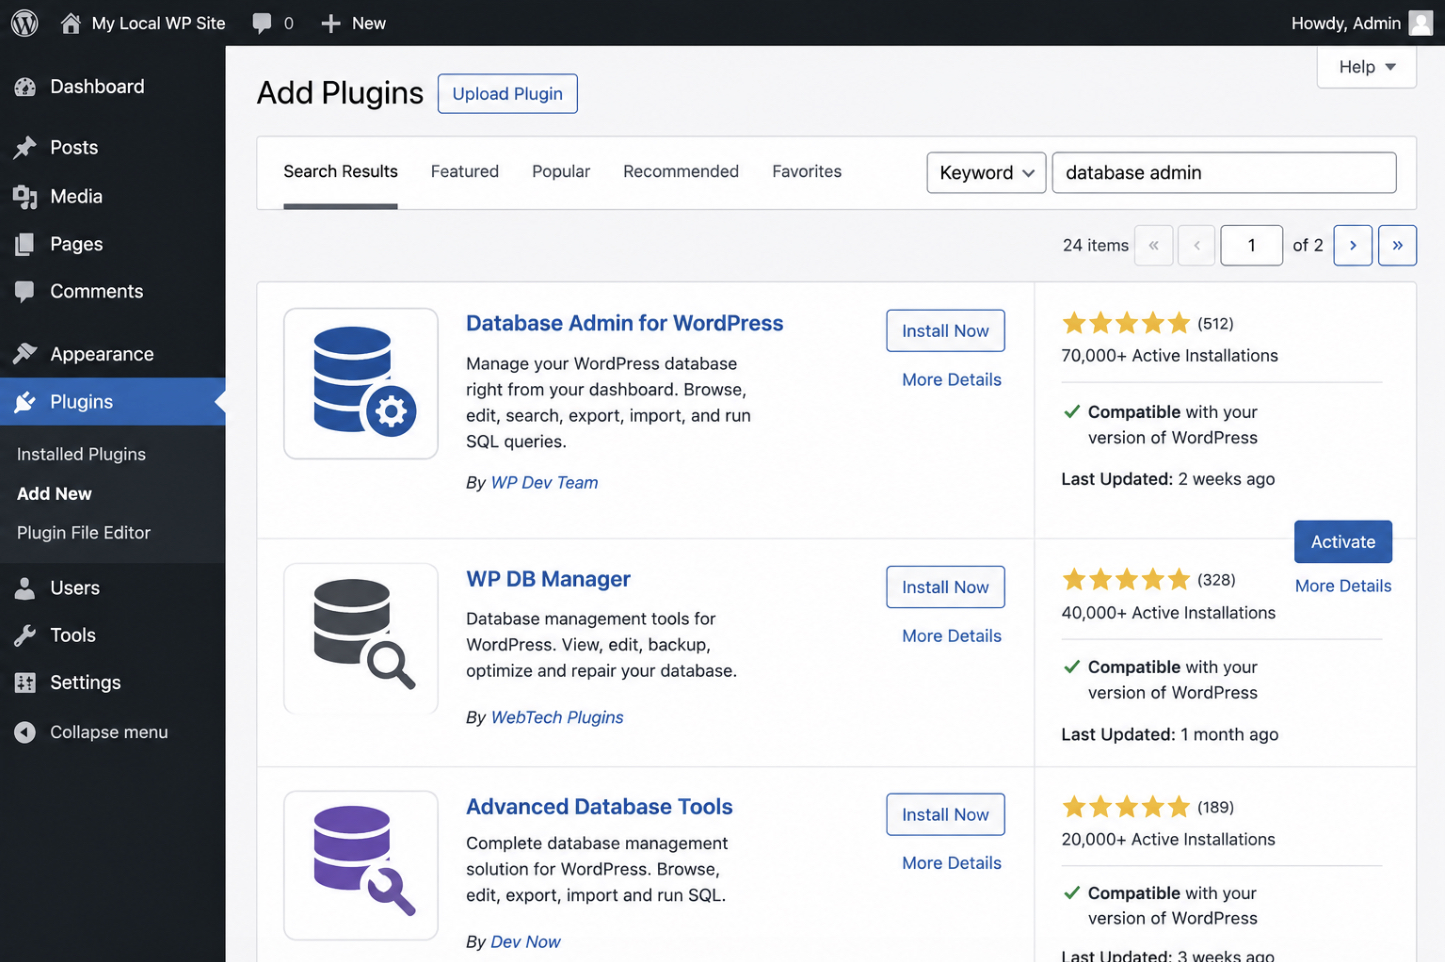
Treat this as one route to that surface, not a survey of every database-admin plugin in the directory. Several plugins add a phpMyAdmin-style screen inside WordPress, and they differ in detail, but the route is the same in each case: find one in the plugin directory, install it, activate it, then open the database-admin screen it adds. The WordPress plugin directory is reachable straight from wp-admin under Plugins, so nothing has to be downloaded by hand.
The Plugins > Add New screen in WordPress lists a database-admin plugin in its results, where the Install Now button installs the plugin and Activate switches it on; once active, the plugin adds its own database-admin entry to the wp-admin menu.
Installing a phpMyAdmin plugin in WordPress takes four steps.
Open Plugins > Add New in wp-admin and search the plugin directory for a database-admin plugin.
Select a database-admin plugin from the results and click Install Now.
Activate the plugin so WordPress loads it and adds its database-admin screen to wp-admin.
Open the database-admin screen the plugin adds, where the WordPress database and its tables appear inside the dashboard.
With the plugin active, database admin runs inside wp-admin, and the same WordPress database the host-level tool would open is now reachable without a control panel or a server login. Whichever way the database is opened (through a host control panel, a self-install, or a plugin inside wp-admin) what appears next is the same set of WordPress core tables the tool operates on.
Which WordPress Tables Does phpMyAdmin Access?
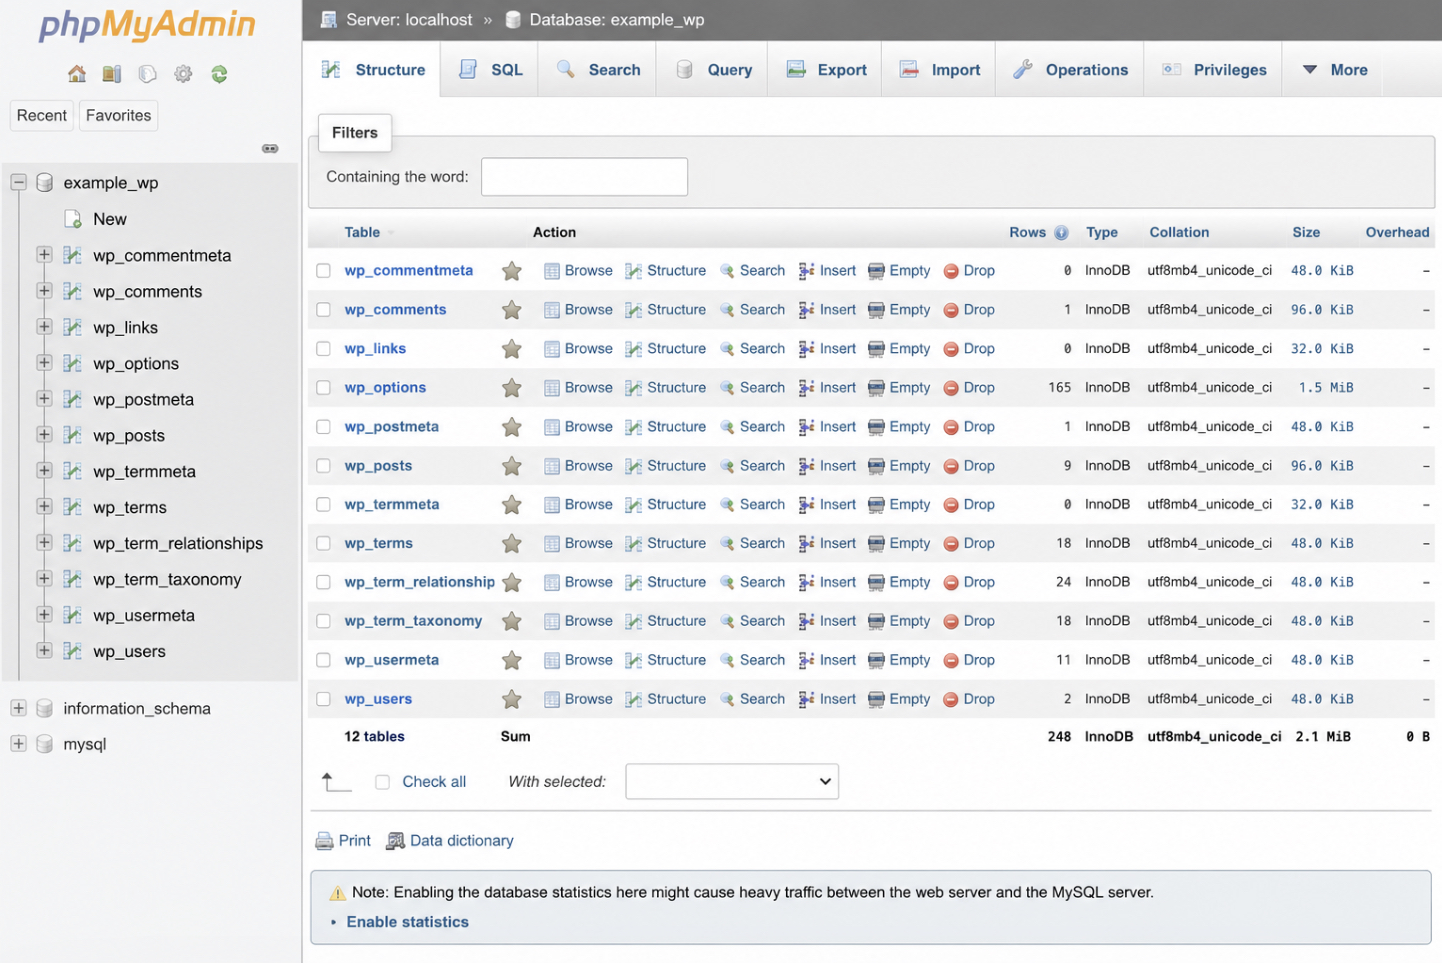
phpMyAdmin accesses the WordPress core tables, the set of tables that appears in the left-hand list once the tool opens the WordPress database, each one named under the wp_ prefix. That prefix is the marker WordPress stamps on every table it owns, and it is what separates the WordPress install from anything else sharing the same database server. Open phpMyAdmin, select the WordPress database, and the left-hand list fills with those wp_ prefixed names.
A standard WordPress install lists twelve core wp_ tables, and three of them carry the weight a site owner reaches for most.
wp_options: the site settings.
wp_users: the accounts.
wp_posts: the content: every page, post, and revision.
The rest of the wp_ tables hold the supporting structure: metadata, taxonomy terms, comments, and the links between them.
This is the operating surface, and naming it is where the orientation stops. Opening a table to read a value is one thing; changing what the tables contain is a set of distinct operations, each large enough to stand on its own. Trimming bloat and tuning the schema for speed is the work of WordPress database optimization.
When a wp_ table is damaged and the site throws a database error, the fix is to repair a corrupted WordPress database. And rewriting URLs stored inside serialized values in wp_options demands wp search-replace rather than a manual edit, because hand-editing serialized data breaks it.
Each of those operations runs against the same wp_ tables, but the steps belong to their own guides. What phpMyAdmin does here is the browser-based way into that database, the tool that opens the WordPress tables and lets their contents be viewed and changed.


 Gemini