Explore our specialized services, tailored solutions, and industry expertise to elevate your digital presence. From custom WordPress development to seamless integrations, we build high-performing websites that deliver impact.
Creating a custom shortcode in WordPress means building a short bracketed tag that outputs dynamic content wherever it is placed. The tag itself is tiny. What it produces (a formatted call-to-action, a list of recent posts, a pricing table pulled from live data) can be as involved as the logic behind it demands. A custom shortcode connects one line of markup to the PHP function that generates its output, and you can reuse the same tag across an entire site without limit.
The build follows a fixed order. Write the function that produces the output, add the attributes that let one tag be configured, register that function with WordPress through add_shortcode(), assemble those parts into one complete working shortcode, then use the resulting tag inside posts, pages, widgets, and template files.
Developers use this pattern to package logic once and reuse it everywhere; site owners get a simple tag to type without touching code again. Each part of the build (the callback that returns the markup, the attributes that make a shortcode configurable, the registration line that lets WordPress recognize the tag) rests on that same order: write, add, register, use.
What Is a Custom Shortcode in WordPress?
A custom shortcode is a square-bracket command that WordPress replaces with dynamic content when it renders. Inside a post it looks like plain text, [my_shortcode], but the moment WordPress renders the page, that bracketed tag disappears and the output of a registered function takes its place. What makes it custom is registration: a custom shortcode is one a developer defines and hooks in through add_shortcode(), which separates it from the built-in shortcodes WordPress ships with and the ones plugins register on their own.
That render-time replacement is the whole mechanism, and a fuller account of what a WordPress shortcode is walks through the built-in tags and where they came from. The tag alone is only the starting point. A custom shortcode does nothing until the function behind it exists, and writing that function is where the PHP begins.
How to Create the Shortcode Function
A shortcode function is the PHP function that produces whatever a custom shortcode outputs when WordPress renders its tag. Creating a custom shortcode in WordPress starts here, with that function: before a bracketed tag can do anything, a PHP function must exist to build the content and return it. This callback is the shortcode’s behavior. The tag is only the trigger; the function runs the logic, and where you place it determines whether WordPress loads it at all.
Write it as an ordinary PHP function, give it a distinct name, and have it return a string:
function itmonks_current_year_shortcode() {
    return date( 'Y' );
}
At its most minimal, that is the whole thing. The shortcode function itmonks_current_year_shortcode() is a PHP function that builds a single value, the current year, and returns that value as its output. A more capable shortcode function first assembles a longer string, a formatted block of markup, and then returns the finished string in one statement at the end. Either way, the pattern holds: build the output, return it.
One detail separates a shortcode function that works from one that quietly fails: the difference between returning output and printing it. A shortcode function must return its output. When the function returns a string, WordPress takes that returned value and substitutes it for the [tag] at the exact position in the content where the tag was typed.
Printing the output straight to the page does something different: it sends the text out early, before WordPress has reached the tag’s position, so the value lands at the top of the page while the tag itself renders as raw text where it sat. That mismatch is the usual reason a shortcode shows up as plain text instead of its intended content. Return the string, and WordPress controls placement.
Naming deserves the same care given to any PHP function. A unique, prefixed name keeps the shortcode function from colliding with a same-named function defined by the active theme, another plugin, or WordPress core. Tying the prefix to the project (the itmonks_ in the example) is the conventional way to guarantee that.
Written on its own, though, the function still does nothing. WordPress has no idea the callback is meant to answer a shortcode tag until the function is registered against a tag name, the step that turns a plain PHP function into an active shortcode. Before that, the function first has to sit somewhere WordPress actually loads.
Where to Add the Shortcode Function?
The shortcode function belongs in a file WordPress loads on every request, so where you add it is a real decision, not a formality. A function defined in a file WordPress never loads doesn’t register at all, so placement can mean the difference between a shortcode available across the whole site and one that is silently absent. Three locations are standard, and each one suits a different situation:
The active theme’s functions.php is the quickest place to add the function. WordPress loads it automatically, it needs no extra setup, and it fits a snippet that only ever matters for the current theme. The catch is that it is theme-bound: switch or update the theme, and the function goes with it, taking the shortcode along.
A custom plugin is a small plugin file that holds the shortcode function. Setting one up takes a few more minutes, but it is portable and survives a theme change, because WordPress loads active plugins independently of whichever theme happens to be running. A shortcode meant to keep working across redesigns belongs here.
A must-use plugin (mu-plugin) is a plugin placed in the wp-content/mu-plugins directory. WordPress loads it automatically, and the dashboard cannot deactivate it. That fits site-critical shortcodes that must stay active on a managed or client site, where an accidental deactivation would cause real trouble.
For a client project, the shortcode function should go in a custom plugin or an mu-plugin rather than in functions.php. The reasoning is portability: agency work changes themes over a site’s lifetime, and a shortcode registered from a plugin keeps rendering through every one of those changes, while the same function left in functions.php disappears the moment the theme does. functions.php stays the right call only for a quick, throwaway snippet tied to one specific theme.
Once you write a function and place it where WordPress will load it, a custom shortcode becomes far more useful when it can accept attributes, the parameters passed inside the brackets that let one tag produce different output depending on how it is used.
How to Add Shortcode Attributes
A shortcode attribute is a customization parameter typed inside the shortcode brackets, and adding attributes is the step that turns a single-purpose custom shortcode into a reusable one. When someone writes [my_shortcode color="red"], WordPress collects everything after the shortcode name and passes it to the callback function as an associative array called $atts. The function reads that array and adjusts what it returns.
Raw user input is incomplete on its own: an attribute nobody types leaves its slot empty. shortcode_atts() handles that. The function defines a set of default values and merges them with the user-supplied attributes, so the callback always receives a complete $atts array to work from.
shortcode_atts() accepts the defaults array first and the incoming $atts second, then returns the merged result. Any value passed inside the brackets overrides the matching default; any attribute left out falls back to the declared default. Escaping the value with esc_attr keeps the returned markup clean before it reaches the page.
Attributes come in three practical kinds. Default attributes set the value a shortcode uses when nothing is passed. User-defined attributes are the values a site owner types inside the brackets to override those defaults. Enclosed content is the text a shortcode wraps when it is written as an opening-and-closing pair. Between them, these three define how much a custom shortcode can be reused across different posts and pages.
Default Attributes
A default attribute is the value a custom shortcode falls back on when the site owner passes nothing inside the brackets. Defaults are declared as an array in the first argument of shortcode_atts(), one key-value pair for every attribute the shortcode supports:
Each key names an attribute; each value is its fallback. With color set to blue and size set to medium, the shortcode still returns a fully styled result even when the brackets carry no attributes at all. The declared defaults guarantee the callback always has a usable value in hand, right up until the site owner supplies one of their own.
User-Defined Attributes
A user-defined attribute is a value the site owner types inside the brackets of a custom shortcode to override its default. Where a default supplies the fallback, a user-defined attribute supplies the deliberate choice:
[my_shortcode color="red"]
Here the site owner passes color="red". WordPress hands that value to the callback as $atts['color'], which now holds red in place of the declared blue. shortcode_atts() merges the supplied value over the matching default, so a user-defined attribute wins wherever it appears and the default quietly fills every slot left blank. Values typed inside the brackets cover most customization; wrapping a block of text calls for a different form of attribute.
Enclosed Content
Enclosed content is the text an enclosing shortcode wraps between an opening and a closing tag. An enclosing shortcode is written as a pair, and the text sitting between the two tags becomes a second value the callback receives:
WordPress passes that inner text to the function as a second parameter, $content. The function can then wrap or transform the enclosed content inside the markup it returns: here $content lands inside a div carrying the box class, and [my_box]Wrapped text[/my_box] renders the phrase Wrapped text in a styled container. An enclosing shortcode is the right form whenever a custom shortcode needs to contain or restyle arbitrary text rather than print a single fixed string.
How to Register a Shortcode with add_shortcode()
Registering with add_shortcode() is the single step that turns an ordinary PHP callback into a working WordPress shortcode. Up to this point the function exists in the codebase, now able to read attributes and wrap enclosed content, yet it stays inert, because WordPress has no record that the [my_shortcode] tag should ever run it. The add_shortcode() call supplies that record. It registers the callback against a tag name, and from that moment the tag becomes something WordPress recognizes across the whole site.
To add a shortcode to WordPress, add_shortcode() accepts two parameters, and both carry weight. The first is the tag, the exact string typed inside square brackets, such as my_shortcode. The second is the callback, the name of the function written earlier, the one that returns its output rather than printing it. Pair the two correctly and the bracketed tag resolves to whatever that function hands back.
Skip this line and the function never fires; the tag prints literally, still just text on the page. Register it, and WordPress activates the shortcode everywhere content is rendered: posts, pages, and template output alike. That is the whole contract of add_shortcode(): a tag string on one side, a registered callback on the other.
A mechanism underpins the convenience. add_shortcode() subscribes a callback to a named tag much as WordPress action hooks bind a function to an event, so registering a shortcode is really an act of wiring one named handler to one trigger. That subscription is what a correctly written wordpress add_shortcode call sets up, and it is the reason the function stays dormant until the registration runs.
With the tag registered and the callback attached, the function, its attributes, and this add_shortcode() call are ready to stand together as one working unit.
A Complete Custom Shortcode Example
A complete custom shortcode example is the whole thing assembled in one place: the function that returns the output, the shortcode_atts() call that resolves attributes, and the add_shortcode() registration that activates the tag, combined into a single copy-pasteable block. Each part was built separately; here they lock into one worked example.
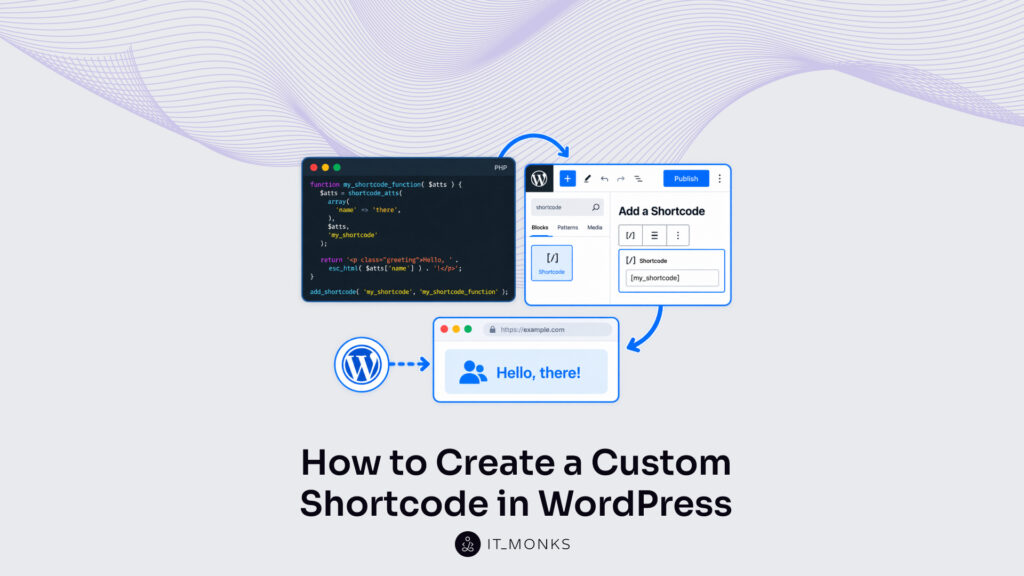
The example combines three moving pieces into one custom shortcode: a callback that returns markup, shortcode_atts() supplying a fallback so [my_shortcode] and [my_shortcode name="Alice"] both resolve cleanly, and the registration that maps the tag to the callback. Drop this block into a theme’s functions.php file or a small plugin, and the [my_shortcode] tag goes live at once.
From here the finished shortcode is ready to place wherever its output belongs.
How to Use a Custom Shortcode
Using a custom shortcode comes down to a single move: once the tag is registered, insert its bracketed [my_shortcode] wherever the output should appear. The same tag behaves identically across posts, pages, sidebar widgets, and template files. WordPress spots the bracketed tag, calls the registered function, and renders the returned output in its place. That portability is why you build one at all: write the function once, register it once, then place the tag on as many content surfaces as the site needs.
Three surfaces cover almost every case. A post or page holds the tag inside the editor. A widget area runs the same tag in a sidebar. The block editor inserts the tag through a dedicated Shortcode block and, through do_shortcode(), carries it into PHP template files where ordinary content cannot reach. Each surface renders an identical result, because each one hands the bracketed tag to the same registered function. No surface gets its own copy of the logic. Posts and pages are the most common surfaces for inserting a shortcode, and the block editor makes that insertion a single step.
Adding a Shortcode to Posts and Pages
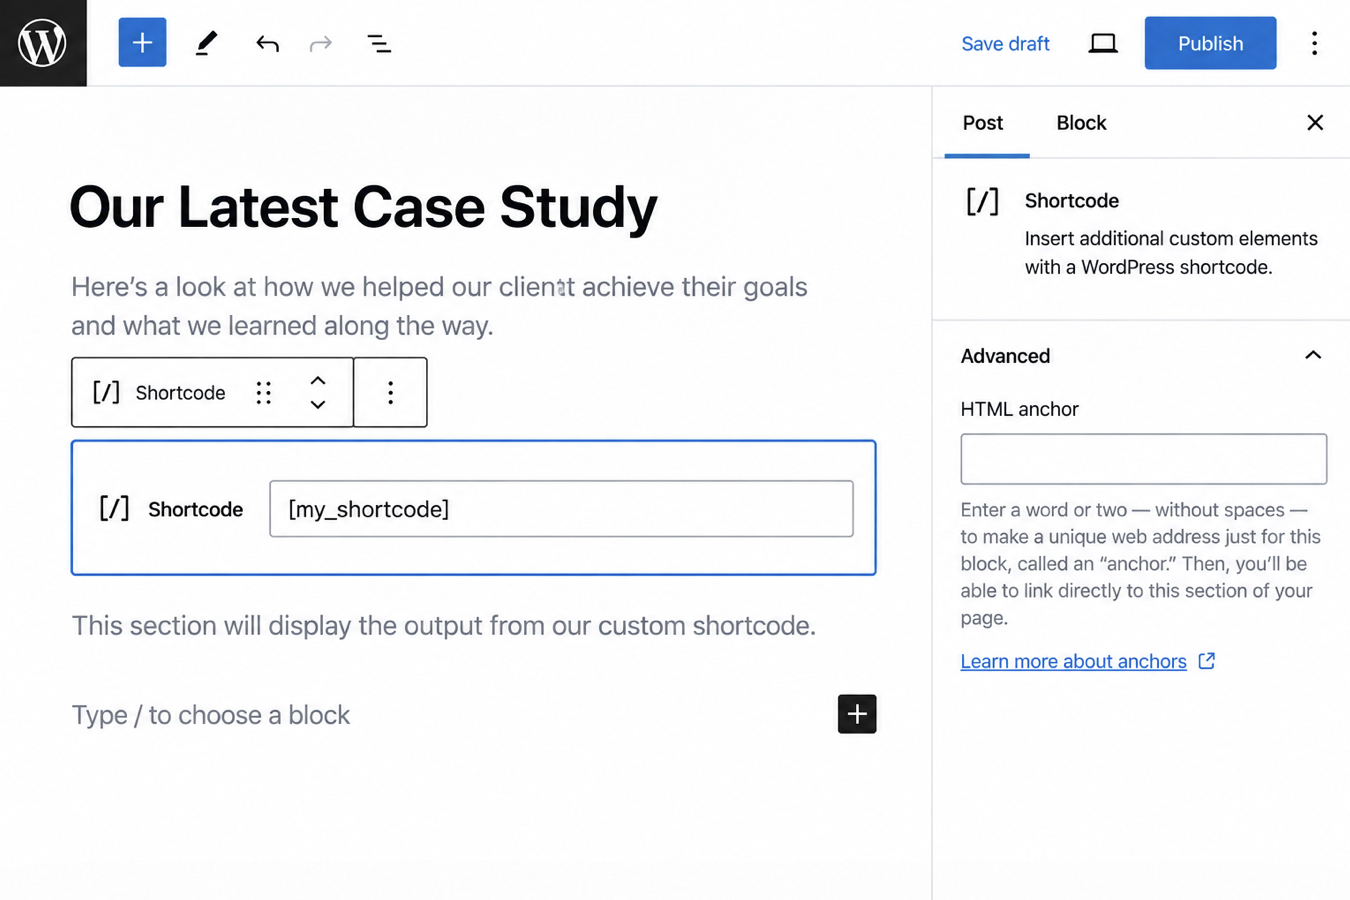
Posts and pages are the most direct place to use a custom shortcode. To place the tag there, add a Shortcode block in the editor and type the bracketed [my_shortcode] inside it; a plain paragraph block accepts the same tag when the classic writing flow is preferred. Either way, only the bracketed tag goes in the editor, never the function itself.
Publishing the post renders the registered function’s output in place of the tag. What visitors read is the finished result, not the bracketed text. The same tag works on any post or page across the site, which is what makes the earlier setup pay off: one function, reused wherever the output belongs.
Adding a Shortcode to Sidebar Widgets
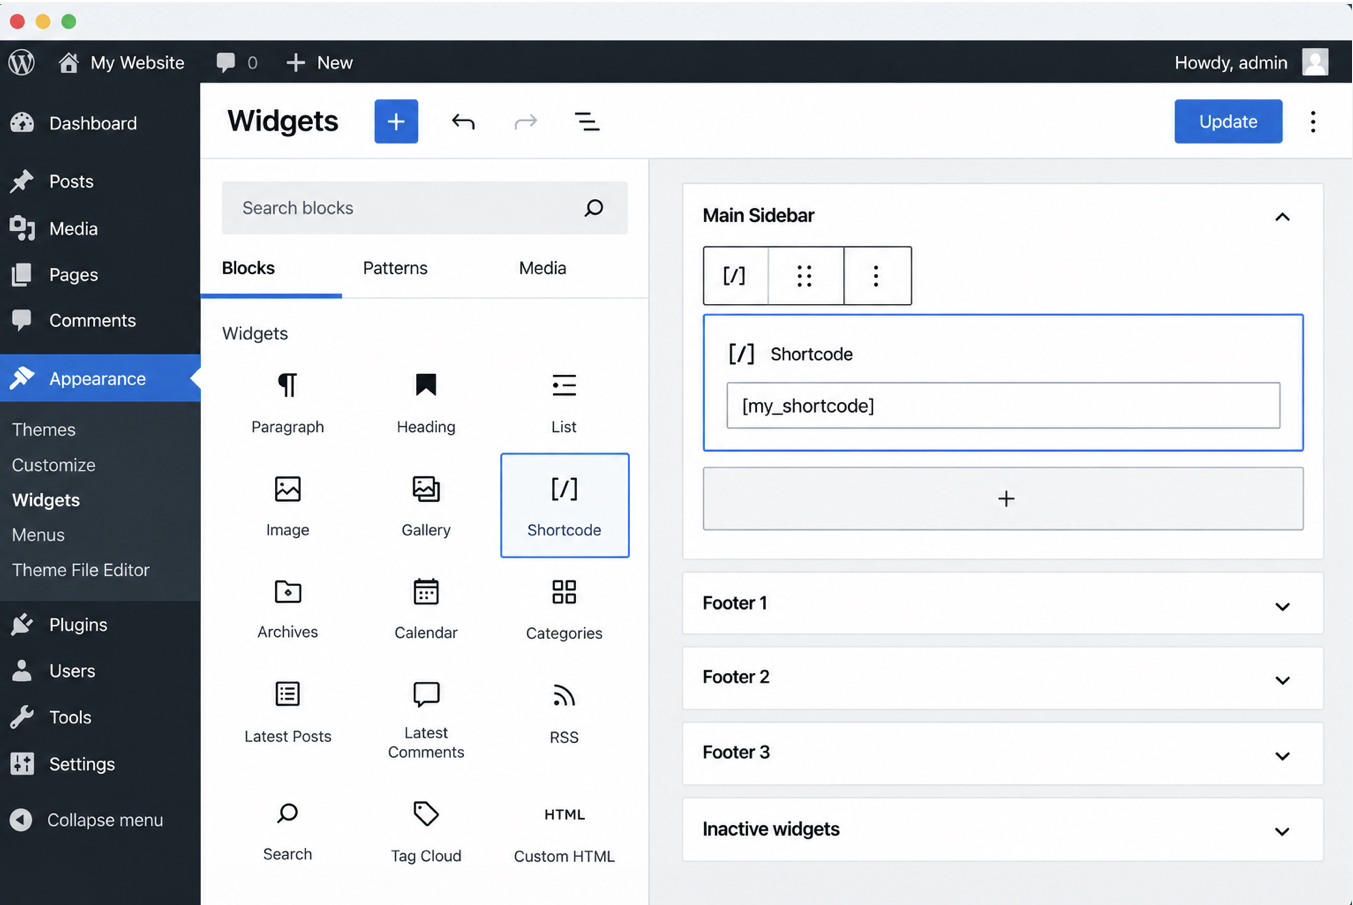
A sidebar widget is the second surface where the same custom shortcode runs. Under Appearance > Widgets, add a Shortcode block to a widget area and paste the bracketed [my_shortcode] tag into it, then save. The tag is identical to the one used inside post content; only its location changes.
Once saved, the widget area renders the same output the shortcode produces inside a post. A pricing table, a call-to-action, or a dynamic list built by the function now appears in the sidebar on every page that displays that widget area, the same code put to use in a different place.
Adding a Shortcode in the Block Editor
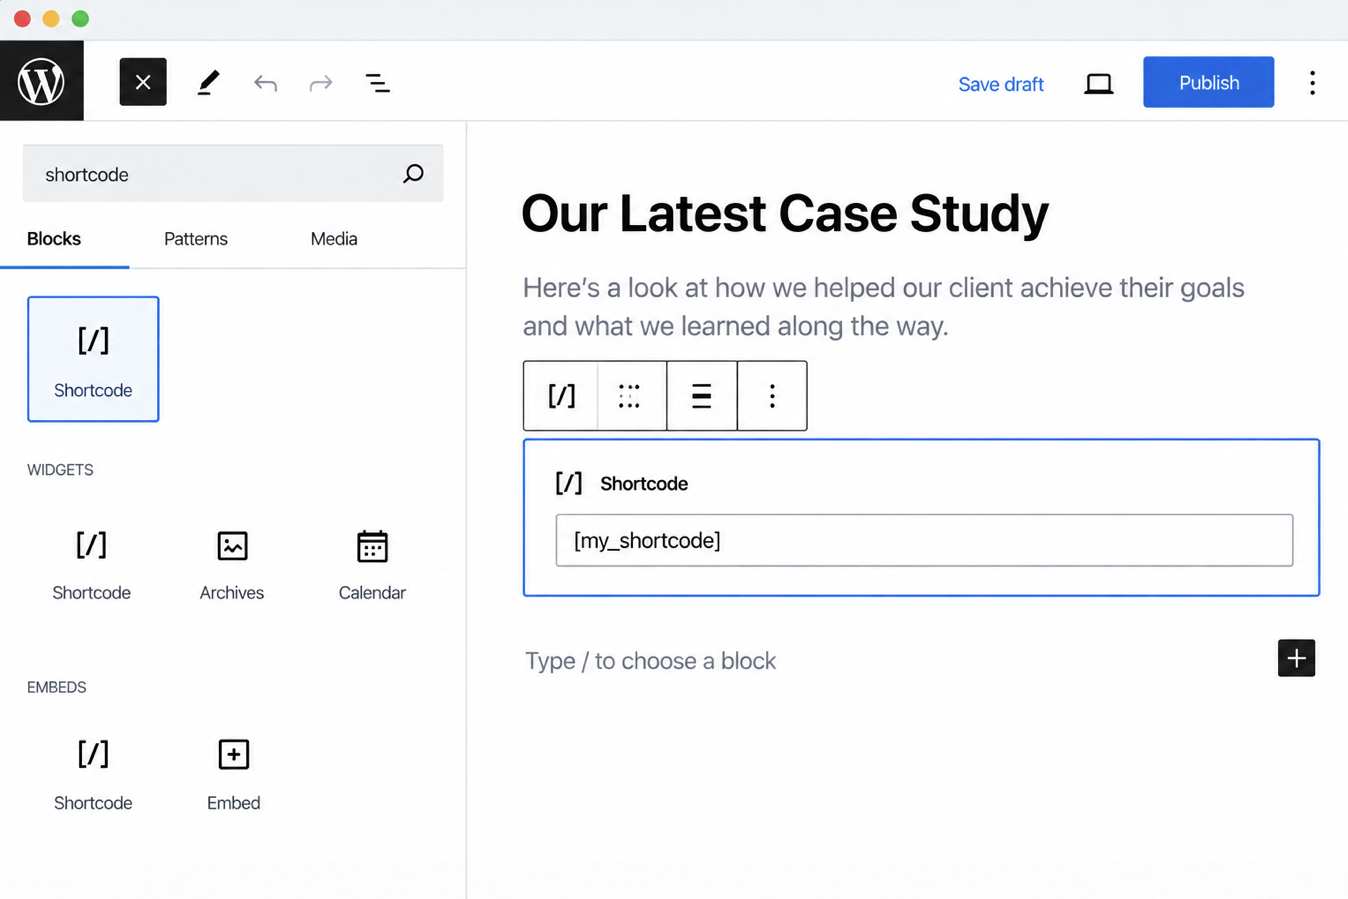
The block editor is the surface most authors reach for first, and the block inserter is the panel that lists every block available to it. The Shortcode block sits in that inserter, and dropping it onto the canvas is the visual route the tag takes into a page,create-custom-wordpress-shortcode the block then holds the tag intact through editing and renders the function’s output only when the page is viewed.
Content areas are not the only place a shortcode has to run. A PHP template file, such as a theme’s single.php or a page template, runs a shortcode through do_shortcode(), which accepts the bracketed tag as a string and returns the same output the block would produce:
<?php echo do_shortcode( '[my_shortcode]' ); ?>
That one call is how the tag reaches spots the editor cannot touch: a header, a footer, or a custom template loop. Where a shortcode has to travel across posts, widgets, and templates alike, it stays the portable choice; where the output is edited visually and stays in one spot, a custom Gutenberg block suits the job better.
Use a Gutenberg Block vs a Custom Shortcode
A custom shortcode and a Gutenberg block are two ways to deliver the same reusable content; output WordPress inserts into a page on demand. One is a bracketed tag; the other is an editor block. When one fits a project better than the other, a custom shortcode is the portable choice and a Gutenberg block is the visual, no-code one.
The heuristic is short, and the deeper shortcodes vs Gutenberg blocks comparison weighs each trade-off point by point. Reach for a Gutenberg block when non-technical editors configure content on screen, with controls built into the editor and nothing to hand-code. Use a custom shortcode when the same output has to run anywhere a string of text can go: one bracketed tag that is valid inside posts, widgets, and template files, and that is defined in a plugin rather than a theme. Choose the block for point-and-click editing; use the shortcode when the same output must run in more than one place.
Editor-first projects tend to choose the block early, before a line of PHP is written. When that decision holds, building a custom Gutenberg block is where that work starts. For output that instead has to travel across posts, widgets, and template files from one bracketed tag, the custom shortcode stays the build that delivers it.







 ChatGPT
  Claude
  Grok
Grok  Gemini