Explore our specialized services, tailored solutions, and industry expertise to elevate your digital presence. From custom WordPress development to seamless integrations, we build high-performing websites that deliver impact.
Docker installation for WordPress development is the work of setting up three components (Docker Engine, Docker Desktop, and Docker Compose) on a developer’s machine so a WordPress project can run inside containers rather than on a hand-configured local server. To install Docker, then, is less a single download than an assembled set of parts: the Engine that runs containers, Docker Desktop for the platforms that install it as a bundled application, and Compose, which defines and starts the multi-container stack a WordPress site requires.
The same installation is required on three operating systems: Ubuntu, macOS, and Windows with the WSL 2 backend. Each one installs Docker by a different route, and each route exists for the same underlying reason. Docker installation is the prerequisite for local WordPress development. Before a WordPress project can run in Docker containers, the Engine and Compose have to be present and working on the machine.
A finished install is not assumed; it is confirmed. The procedure has a defined endpoint, the docker run hello-world check, which confirms the Engine can pull an image and run a container before any WordPress work begins. Which of the three components a given machine actually needs, and how it gets them, depends first on the operating system that machine already runs.
How to Install Docker by Platform for WordPress Development
Installing Docker by platform means matching one install artifact and one install method to the operating system the development machine runs, and that operating system is the first thing that decides the whole procedure, because it fixes both which Docker artifact goes onto the machine and which method puts it there. There is no separate platform to pick. The platform is whichever operating system the development machine already runs, what changes with it is the install itself.
To install Docker on Ubuntu is to install the headless Docker Engine straight from the apt repository: the daemon and the docker command-line client, with no graphical layer at all. To install Docker on a Mac, or to install Docker on Windows, means installing Docker Desktop instead, the bundled graphical application, because neither operating system runs the Linux kernel the Engine needs on its own. Windows requires one more thing before Docker Desktop will start at all: the WSL 2 backend, a genuine Linux kernel running under Windows 11, has to be enabled first. On Ubuntu the relevant releases are the current long-term-support versions, 24.04 and 22.04.
Each operating system resolves to one install artifact and one install method:
Operating system
Docker install artifact
Install method
Ubuntu (24.04, 22.04)
Docker Engine
apt repository
macOS
Docker Desktop
Direct download or Homebrew
Windows 11 (with WSL 2)
Docker Desktop + WSL 2 backend
Direct download
Linux (other distributions)
Docker Desktop or Docker Engine
Download or package manager
Across all four rows the outcome is identical (a working Docker installation ready for a WordPress project), and only the artifact and the mechanism differ. For a machine running Ubuntu, that mechanism is apt, and the Docker Engine it installs is where the WordPress-development setup begins.
How to Install Docker Engine on Ubuntu
Installing Docker Engine on Ubuntu means putting the headless Docker Engine (the background daemon plus the docker command-line client, with no graphical interface) onto an Ubuntu system through the apt repository. On Ubuntu, Docker Engine is the correct artifact rather than Docker Desktop, because the operating system already supplies the Linux kernel the Engine runs against, so no bundled virtualization layer is required. The Engine is also what a server carries: a headless Ubuntu Server install runs Docker the same way, with no desktop present.
The install targets a current long-term-support release. Docker Engine installs on Ubuntu 24.04 and on Ubuntu 22.04 through the same steps, and the Docker project publishes packages for each. Two ways exist to install Docker Engine on Ubuntu, but the apt repository method is the recommended one, since it keeps the Engine current through the system’s normal package upgrades instead of a one-off download. Whichever release is in use, the Engine installed here is the same component the WordPress Compose stack depends on. Without it, no WordPress container can start.
The procedure opens with a package-index refresh, so apt reads the newest available versions before anything is added:
sudo apt update
# Docker Engine is not in Ubuntu's default repositories.
# The next step adds Docker's official apt repository, then installs the Engine from it.
Adding Docker’s GPG signing key and the repository source entry, then installing the Engine packages from that repository, is the part of the install that comes next, after which a permissions step adds the developer’s account to the docker group, so docker commands run without root.
Install Docker Engine from the apt Repository
The apt-repository method is the supported route to install Docker Engine on Ubuntu, pulling the docker-ce packages straight from Docker’s official repository instead of the older version Ubuntu bundles by default. Docker Engine, set up this way, tracks each point release and becomes the runtime a WordPress developer depends on to build and run a local WordPress stack. Two things happen, in order: Docker’s GPG key and apt repository are registered, then the docker-ce packages are installed.
Registering the key comes first. It instructs apt to trust packages Docker has signed and points the package manager at the correct repository for the running Ubuntu LTS release.
The docker-ce package is the Engine daemon itself. docker-ce-cli is the command-line client that issues instructions to that daemon, and containerd.io is the low-level runtime that actually starts and supervises containers. Once apt finishes, the Docker Engine service is running on the machine and ready to serve the WordPress development workflow, though a clean install still expects root access, a constraint the permissions setup removes.
Docker Engine Permissions on Ubuntu
Docker Engine permissions on Ubuntu decide which accounts may talk to the Docker daemon. Straight after the apt install, Docker Engine requires root: every docker command has to be prefixed with sudo, because the daemon’s control socket is owned by root. For day-to-day WordPress development, where a developer starts, stops, and rebuilds containers dozens of times an hour, that constant sudo is an inconvenience rather than a security gain.
The fix grants non-root access by adding the user account to the docker group. Membership in the docker group lets an ordinary account reach the daemon socket directly, so the permissions requirement drops to what a local development routine needs.
sudo usermod -aG docker $USER
Group membership does not apply retroactively to a shell that is already open. The change takes effect after a full re-login, or immediately in the current terminal once the new group is activated:
newgrp docker
After either action, docker commands run under the developer’s own account, and Docker Engine drives the local WordPress containers without root, the same Engine, now reachable the way a Linux workstation is normally used. Ubuntu supports this headless Engine setup alongside a graphical alternative, Docker Desktop, installed from a downloaded package.
How to Install Docker Desktop on Ubuntu
Docker Desktop for Linux is the graphical way to install Docker Desktop on Ubuntu, packaged as a downloadable .deb that bundles the Docker Engine, the command-line tools, and a dashboard into one application. Where the headless Engine route keeps everything at the terminal, Docker Desktop for Linux adds a managed virtual machine and a graphical dashboard on top: the same container runtime a WordPress developer relies on, presented through a window rather than a prompt.
Installing Docker Desktop on Ubuntu begins with the download. The .deb package comes from the official Docker documentation site, docs.docker.com, matched to the machine’s architecture. Once the file is saved, apt installs it together with its dependencies:
The leading ./ matters. It directs apt to install the local .deb file on disk instead of searching the repositories for a package by that name. That local .deb still installs its dependencies (the docker-ce-cli, buildx, and compose plugins) from Docker’s apt repository, so the Desktop-only route sets up Docker’s apt repository first, the same GPG-key-and-repository registration the headless Engine route performs, and so avoids unmet-dependency errors. With Docker Desktop installed, a per-user service command launches the application:
systemctl --user start docker-desktop
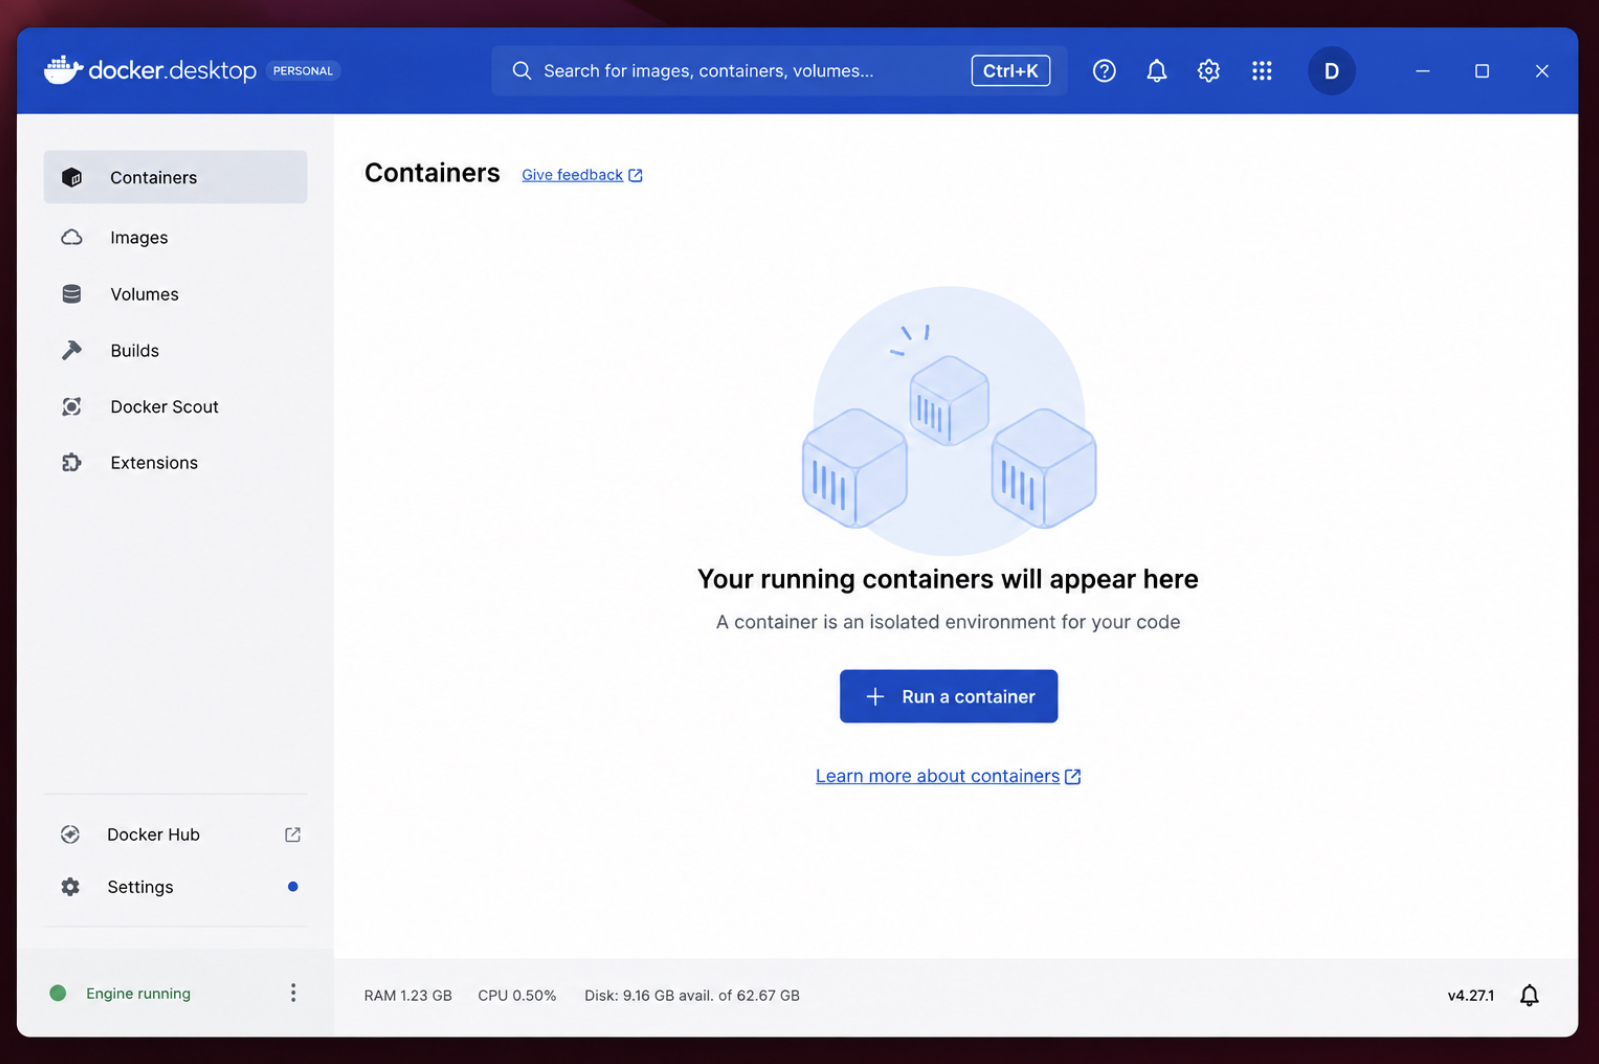
On first launch, Docker Desktop for Linux opens to its dashboard with an empty Containers list, since no containers exist yet on a clean install. From that dashboard the graphical application manages the same images and containers a local WordPress project depends on, and Ubuntu supports both this Desktop route and the headless Engine route equally well. macOS reaches Docker Desktop by a different path.
How to Install Docker Desktop on macOS
Docker Desktop for Mac is the graphical application that installs Docker on macOS, packaging the Docker Engine, the command-line client, and Docker Compose into one managed runtime. Installing Docker Desktop on macOS gives a WordPress developer on an Apple machine the exact container runtime the local development stack expects. The install runs in two ordered steps: download first, then launch, and each step is literal.
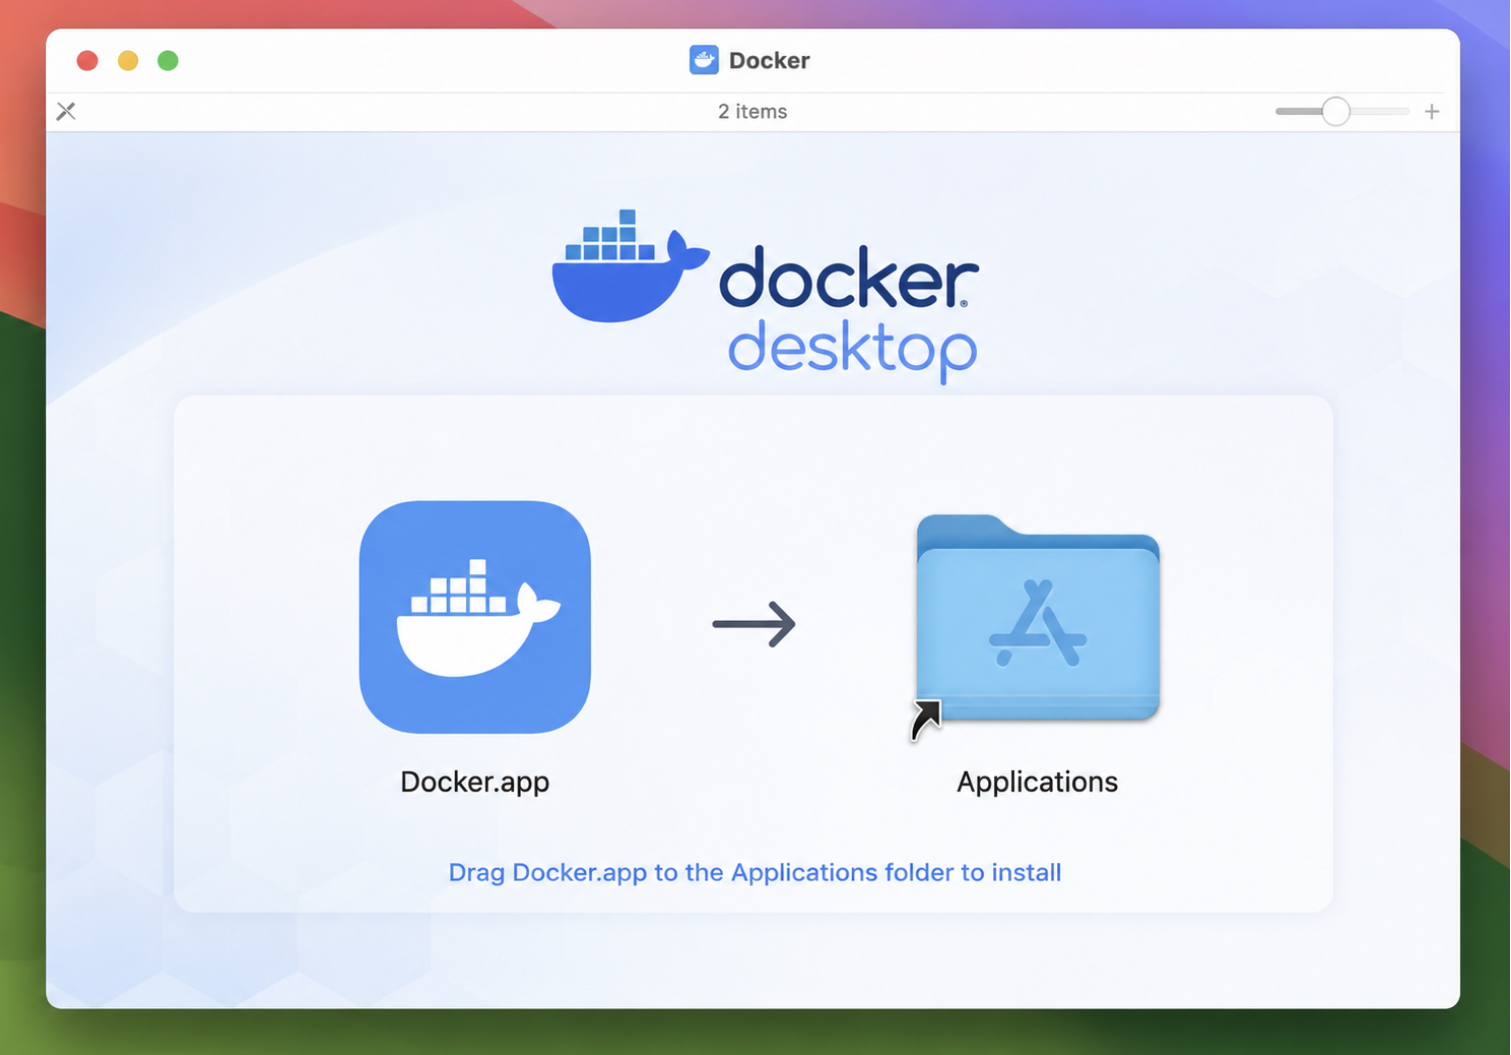
The download comes from docs.docker.com in two builds. Apple silicon machines take the Apple silicon build; older Intel machines take the Intel one. Matching the build to the processor matters, since the wrong one will not launch. What arrives is a disk image, a .dmg file, the download delivers the installer, nothing more.
Opening the mounted disk image and dragging Docker.app into the Applications folder is the install itself: macOS copies Docker Desktop into place, and the application is ready to open from Applications like any other program. Launched once, Docker Desktop sets up the Docker Engine, requests the permissions it needs, and then runs. The whale icon in the menu bar marks the running state.
A WordPress developer who already manages macOS tooling from the terminal has a second route to the same application, driven by Homebrew rather than the disk image.
brew install Docker Desktop on macOS
Installing Docker Desktop through brew gives macOS a command-line alternative to the download-and-drag route, with Homebrew doing the work. The Homebrew cask method (brew install --cask docker-desktop) suits a developer who already runs Homebrew on the machine and would rather keep the WordPress toolchain reproducible from the shell than click through a disk image. Homebrew renamed this cask to docker-desktop; the bare docker cask collided with the docker command-line formula and no longer installs Docker Desktop.
brew install --cask docker-desktop
Homebrew installs Docker Desktop as a cask, its format for graphical macOS applications, placing the application in Applications and leaving it ready to launch. One command sets up what the manual route sets up, and the result is the same Docker Desktop, the same Docker Engine, and the same Docker Compose underneath.
On Windows the install takes a different shape, because Docker Desktop there runs on a Linux subsystem rather than on macOS directly.
How to Install Docker Desktop on Windows with WSL 2
Docker Desktop for Windows is the application that installs Docker on Windows, running the Docker Engine on the WSL 2 backend, the second version of the Windows Subsystem for Linux. Installing Docker on Windows for WordPress development begins one step before the download, because Windows requires the WSL 2 backend in place first. WSL 2 supplies the Linux kernel that Docker Desktop runs its containers on, so it gets enabled ahead of everything else.
wsl --install
The wsl --install command, run in an elevated PowerShell window, enables the subsystem, installs a default Linux distribution, and asks for a restart to finish. On Windows 11 the subsystem and the virtualization it depends on are available without any legacy setup.
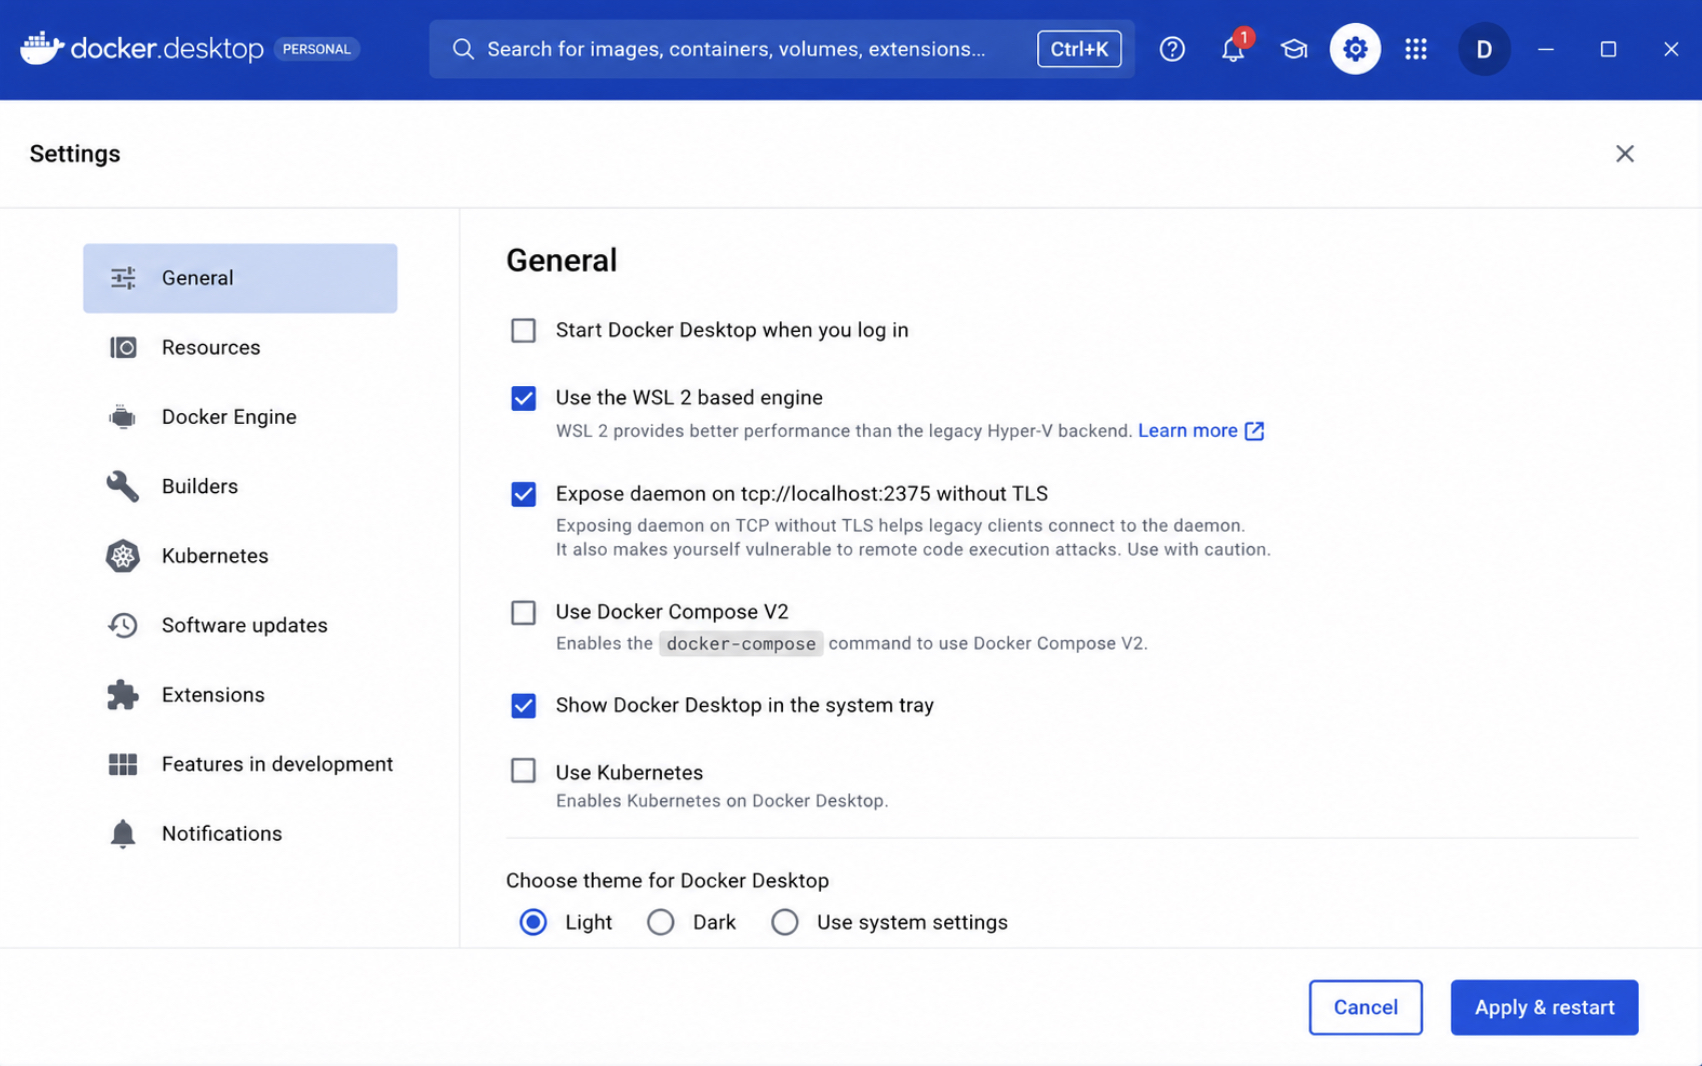
With WSL 2 running, the Docker Desktop for Windows installer downloads from docs.docker.com and runs. Setup keeps the WSL 2 based engine enabled by default, and that setting stays reachable afterward in Settings → General as “Use the WSL 2 based engine.” The enabled engine is what ties Docker Desktop for Windows to the Linux containers the local WordPress stack builds on.
Docker Desktop for Windows carries Docker Compose in the same installer, which sets up the last component the WordPress stack calls on before the containers start.
How to Install Docker Compose
Docker Compose is the multi-container tool a local WordPress stack depends on, and installing Docker Compose means adding the Compose v2 plugin that Docker runs as docker compose. One YAML file describes the whole environment; the plugin reads it and starts the containers a WordPress site needs (the PHP application server, the MySQL or MariaDB database, and a database admin container when the stack includes one) as a single coordinated set. Three separate docker run invocations collapse into one command. That is precisely why the install matters for WordPress development: the stack that serves the site is defined once and brought up as a unit.
On any machine that already carries Docker Desktop, Compose is bundled. The Desktop installer places the v2 plugin next to Docker Engine, so no separate step exists there. The explicit install is required on the headless Ubuntu Engine route. Docker Engine installed on its own does not include Compose, and the plugin has to be added deliberately.
Two forms of the tool still circulate, and the difference between them matters. The current form is Docker Compose v2, invoked with a space as docker compose. The older standalone binary, the hyphenated docker-compose, was the v1 form and is no longer the target of a fresh install. Which form answers on a given machine takes one command to settle:
docker compose version
A reply that names Compose v2 confirms the plugin is present and the WordPress stack can be brought up from its compose file. The hyphenated legacy invocation is worth recognizing only so the space-separated v2 command is not mistaken for a typo. On the Ubuntu Engine route, that explicit install is the remaining step.
Install Docker Compose on Ubuntu
Installing Docker Compose on Ubuntu is the apt route that supplies the plugin the headless Docker Engine setup does not ship with. Docker Engine on Ubuntu installs on its own, without the Desktop bundle that would otherwise carry Compose, so the plugin comes from the same apt repository that delivered Engine in the first place. Docker Compose reaches the machine as a package with an exact name, docker-compose-plugin:
sudo apt-get install docker-compose-plugin
The package name does not vary. docker-compose-plugin installs the Compose v2 plugin, and no shortened or hyphen-free spelling resolves to it. Once apt reports the package installed, a single command confirms the plugin registered with Docker and the space-separated call works:
docker compose version
A version string naming Compose v2 means Docker Compose is ready on Ubuntu, and the WordPress stack can start from its compose file. The headless Engine install now carries the same Compose capability the Docker Desktop bundle provides on macOS or Windows. With Engine and Compose both in place, the install is ready to be checked from end to end.
Docker Installation Verification with docker run hello-world
Docker installation verification is the closing step that confirms the Docker installation runs correctly before any WordPress work begins, and docker run hello-world is the command that proves it. Verification means something specific here: showing that Docker Engine can pull an image, build a container from it, and run that container to completion. Until that round trip succeeds, the install is not yet a dependable prerequisite for local WordPress development.
docker run hello-world
# expected:
# Hello from Docker!
# This message shows that your installation appears to be working correctly.
docker run hello-world pulls the small hello-world test image from Docker Hub, creates a container, and runs it. The container prints a short message and exits almost at once. When the output opens with Hello from Docker!, every layer the install depends on has answered in turn (the Docker daemon received the request, the image downloaded, and the container executed), which is the signal that the Docker installation is complete and working correctly.
A verified install is the prerequisite for the rest of local WordPress development. With Docker Engine, Docker Compose, and a clean hello-world run all in place, the machine is ready to run WordPress in Docker with docker-compose, where the compose stack brings up the WordPress application, its database, and the supporting containers together as one environment.
Docker Desktop or Docker Engine for WordPress Development?
Choosing between Docker Desktop and Docker Engine is the last install decision a WordPress developer makes, and the operating system drives most of it. Docker Desktop is the graphical application that installs as the default on macOS and on Windows. Docker Engine is the headless command-line runtime that installs directly on Ubuntu and on servers. Both run the same container runtime under a local WordPress project; only one of them adds a dashboard on top.
A WordPress developer picks one of two installable forms:
Docker Desktop: the graphical application, and the default on macOS and Windows.
Docker Engine: the headless command-line runtime, common on Ubuntu and on servers.
Docker Desktop suits a WordPress developer on a macOS or Windows laptop, where the dashboard and the bundled tooling install in one step. Docker Engine suits an Ubuntu workstation or a remote server, and it is the way to install Docker without Docker Desktop: the lean, command-line-only path with no graphical layer. The choice is made one machine at a time. A macOS laptop takes Desktop; an Ubuntu box takes Engine; a developer who works across both installs the form that matches each operating system. Docker Desktop, the option a macOS or Windows developer installs, carries more than its dashboard.
What Is Docker Desktop?
Docker Desktop is the graphical application that bundles a complete Docker installation into one package for macOS, Windows, and Linux. What Docker Desktop is, in install terms, is an all-in-one download: a single installer that provides the runtime, the command-line client, the compose plugin, and a dashboard together, so nothing has to be added by hand afterward.
Docker Desktop bundles four components that a WordPress developer would otherwise install one by one:
Docker Engine: the runtime that builds container images and runs containers.
the docker CLI: the command-line client that issues docker commands.
Docker Compose: the v2 plugin that runs a multi-container stack from a single docker compose file.
a graphical dashboard: the window that shows running containers, images, and volumes at a glance.
A WordPress developer who needs the underlying container and image concepts before the install itself can find them in Docker for WordPress developers. On a macOS or Windows machine, installing Docker Desktop therefore covers the whole Docker installation in a single step, and leaves a WordPress developer with the runtime, the docker CLI, Docker Compose, and the dashboard already in place for a local site.






 ChatGPT
  Claude
  Grok
Grok  Gemini